Build
Build itAssembly guide
Build your TiltRod
Two parts. Part 1: build the drive. Part 2: put it on your blind and set it up. Already assembled? Start at Part 2.
What's in your box
Tap your box to see every part in it.
- ×1
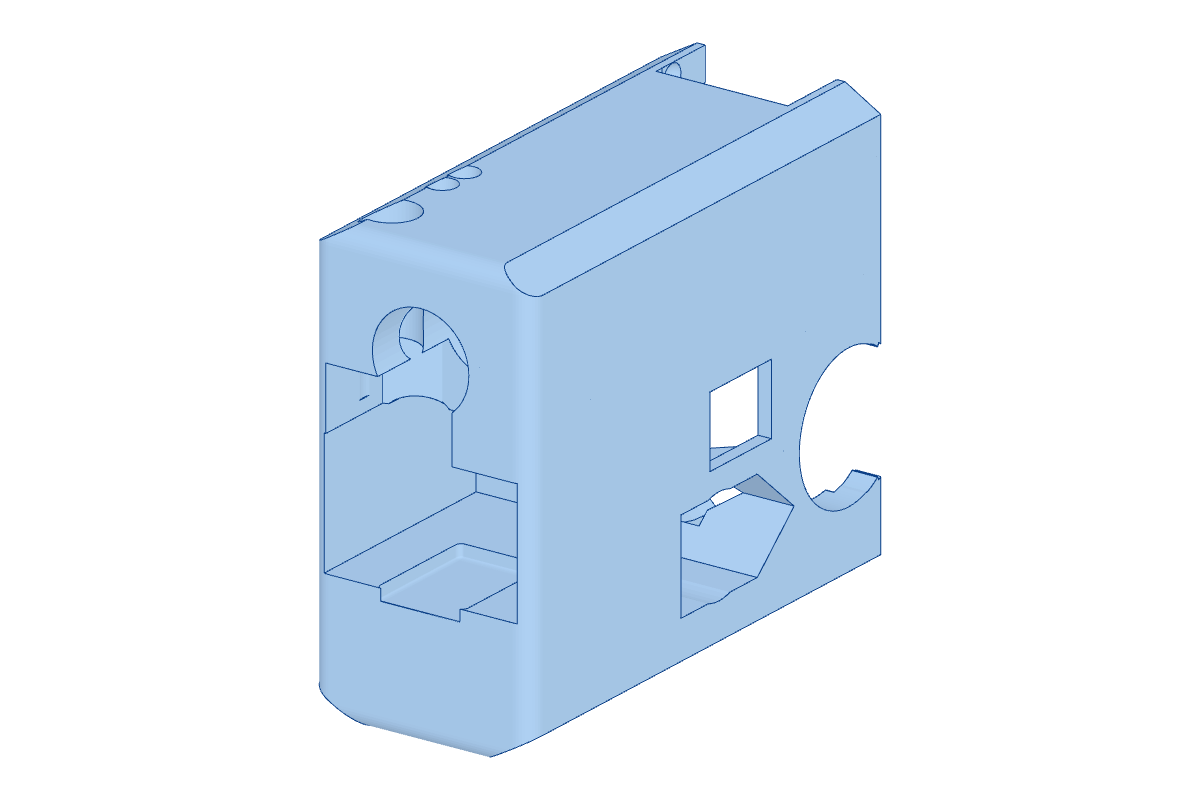
Shell A
- ×1
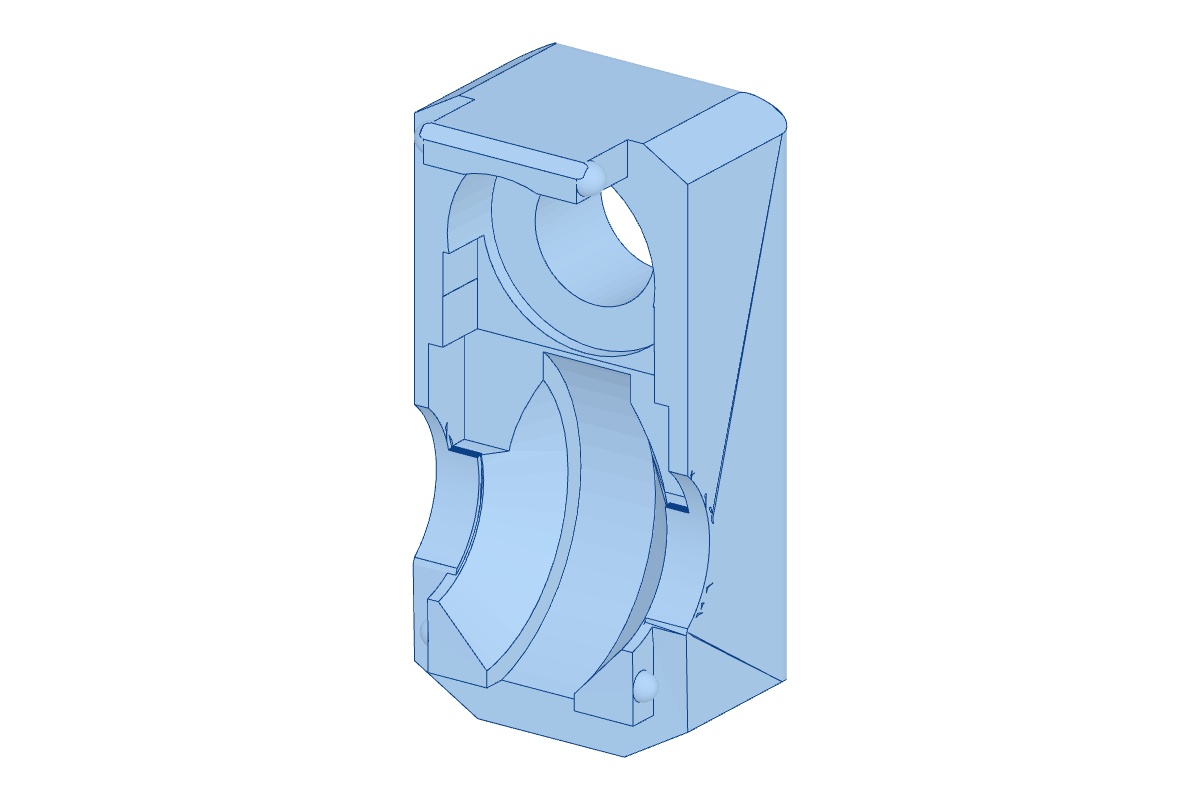
Shell B
- ×1
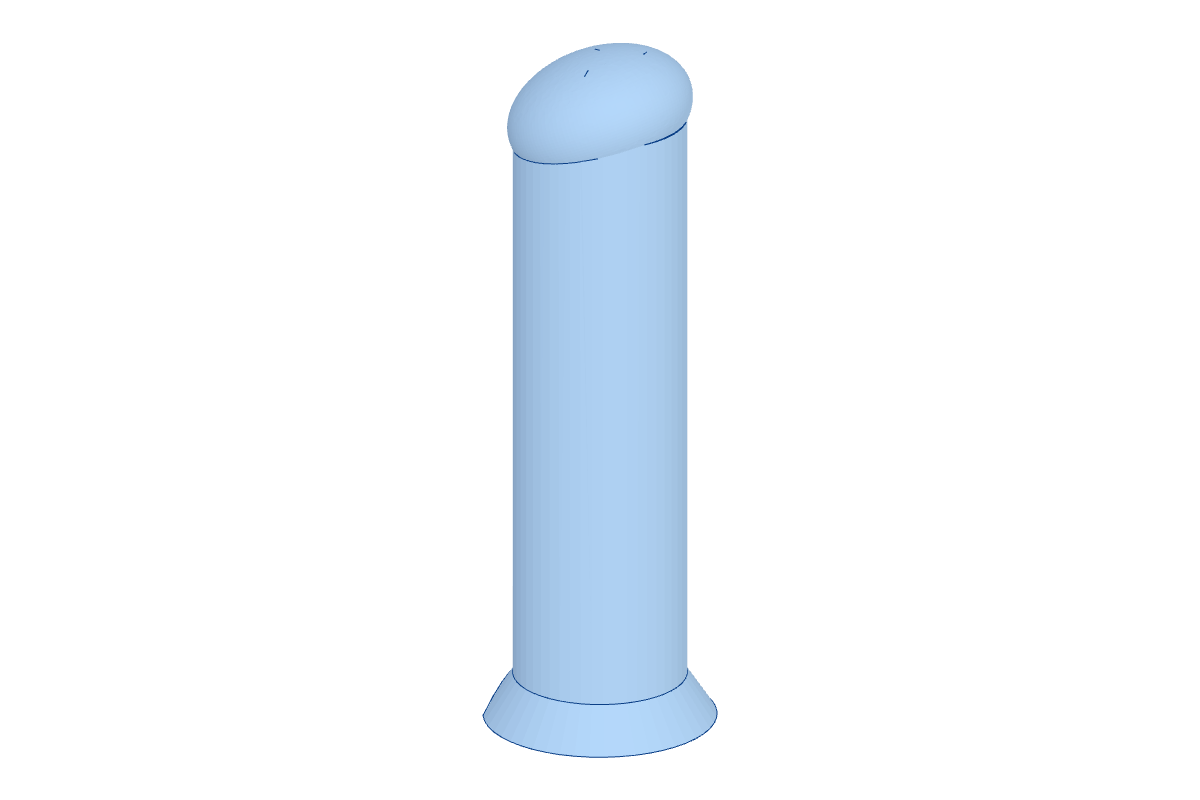
Button
- ×1
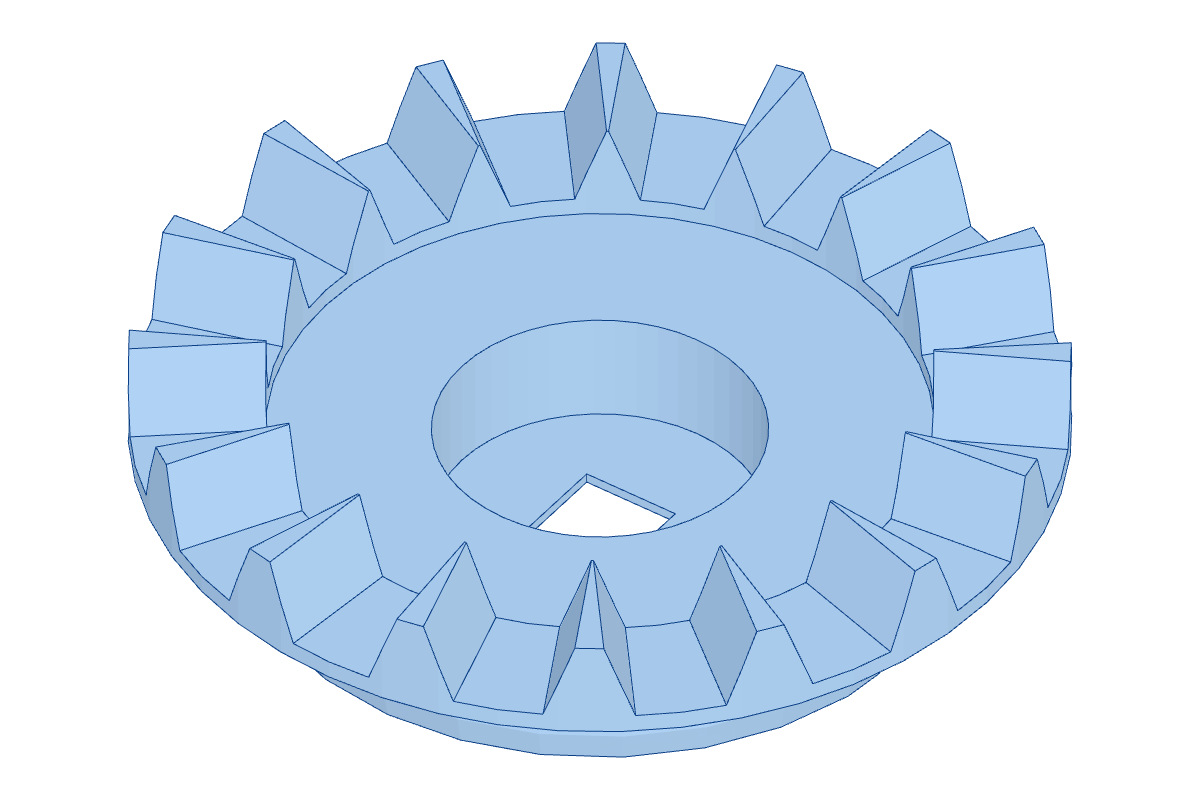
Crown gear
- ×1
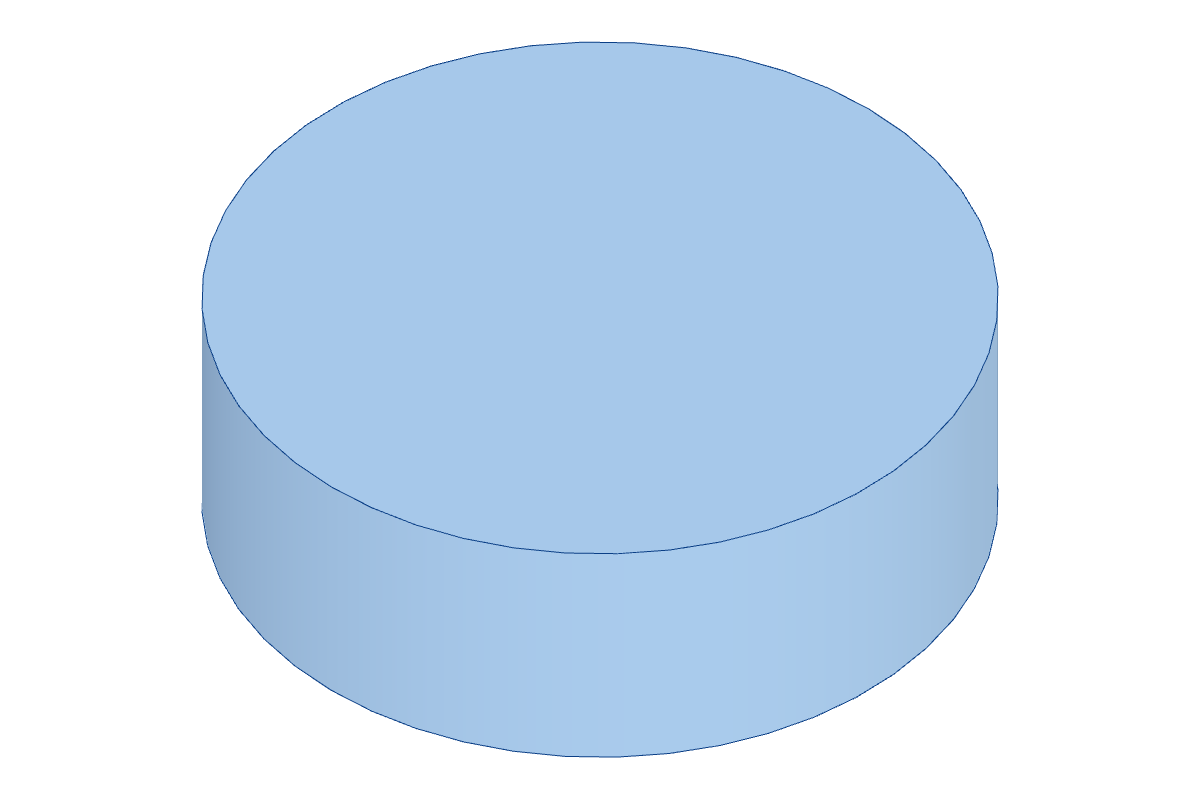
Magnet, 4.7 mm
- ×1
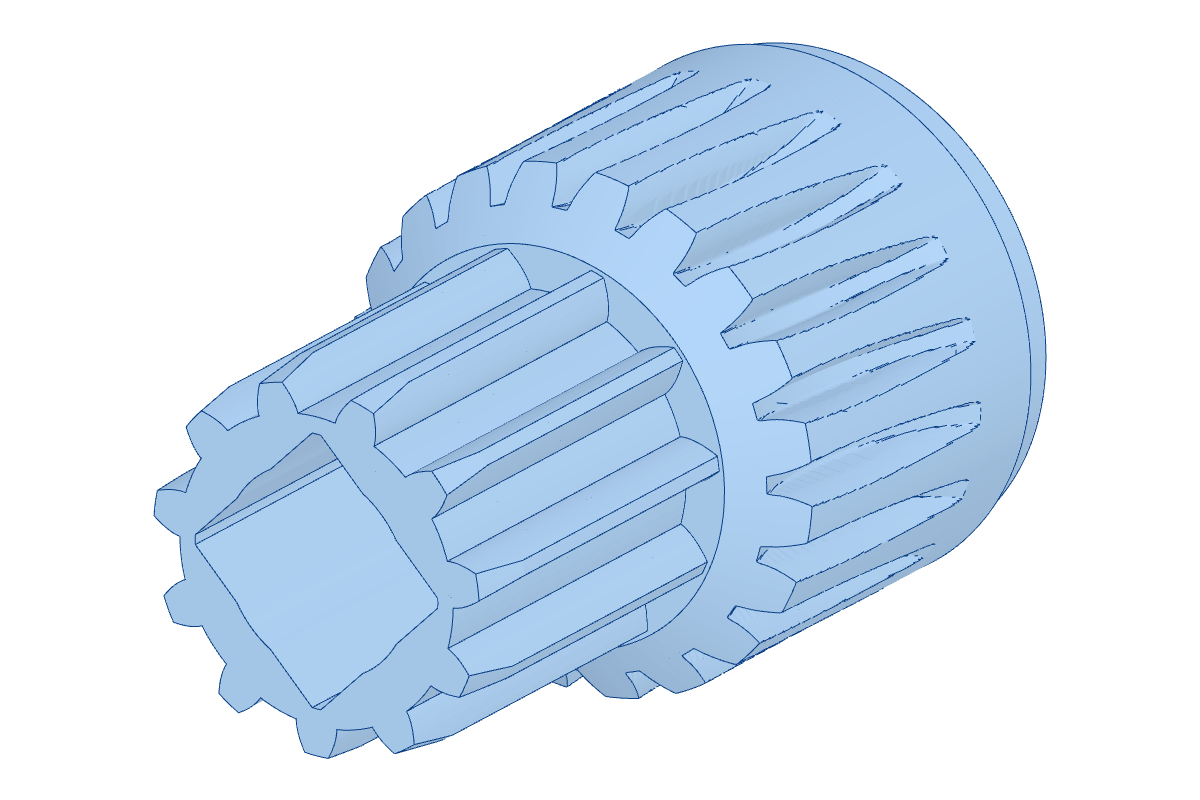
Rod gear
- ×1
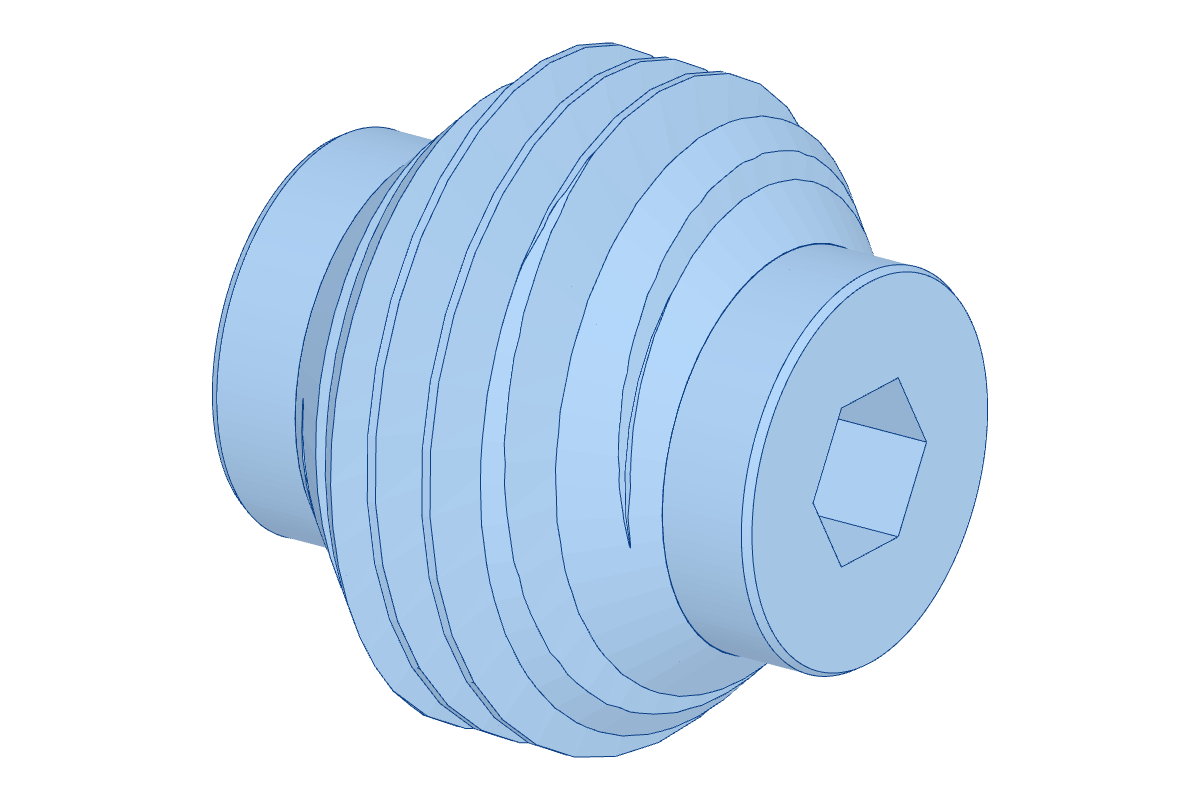
Worm
- ×1
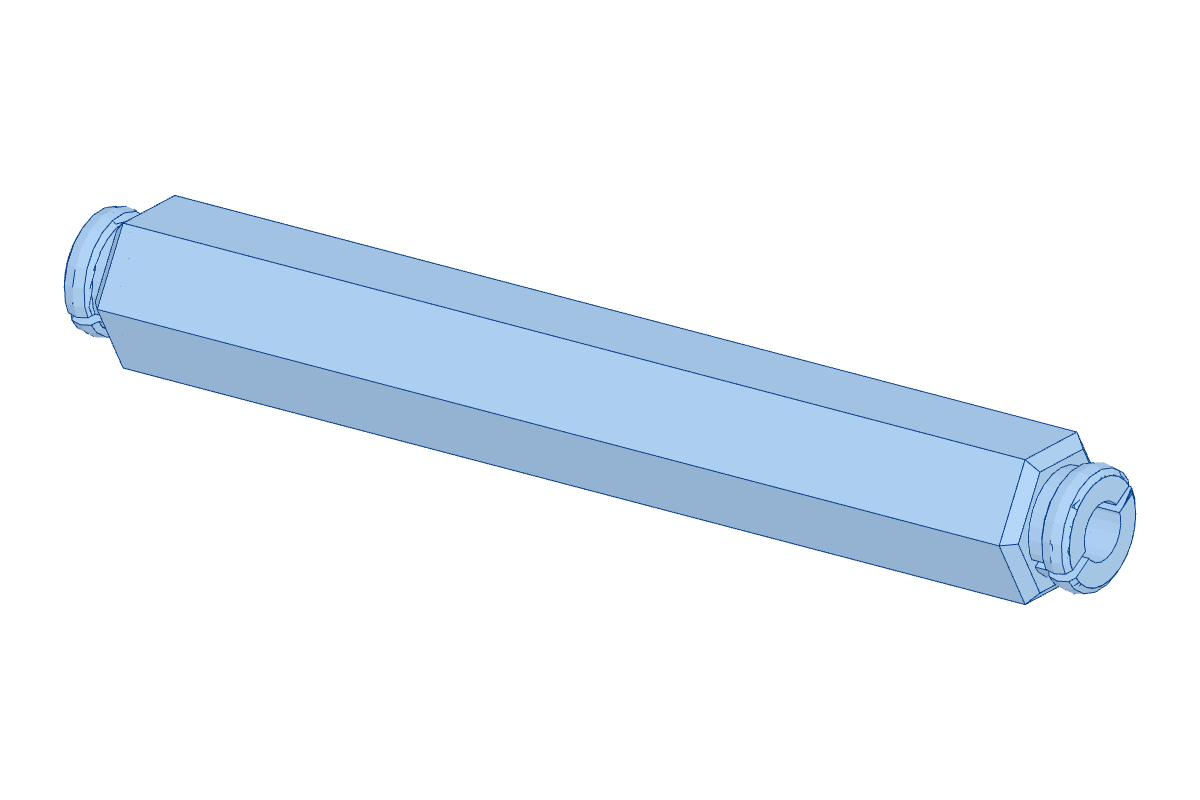
Axle
- ×1
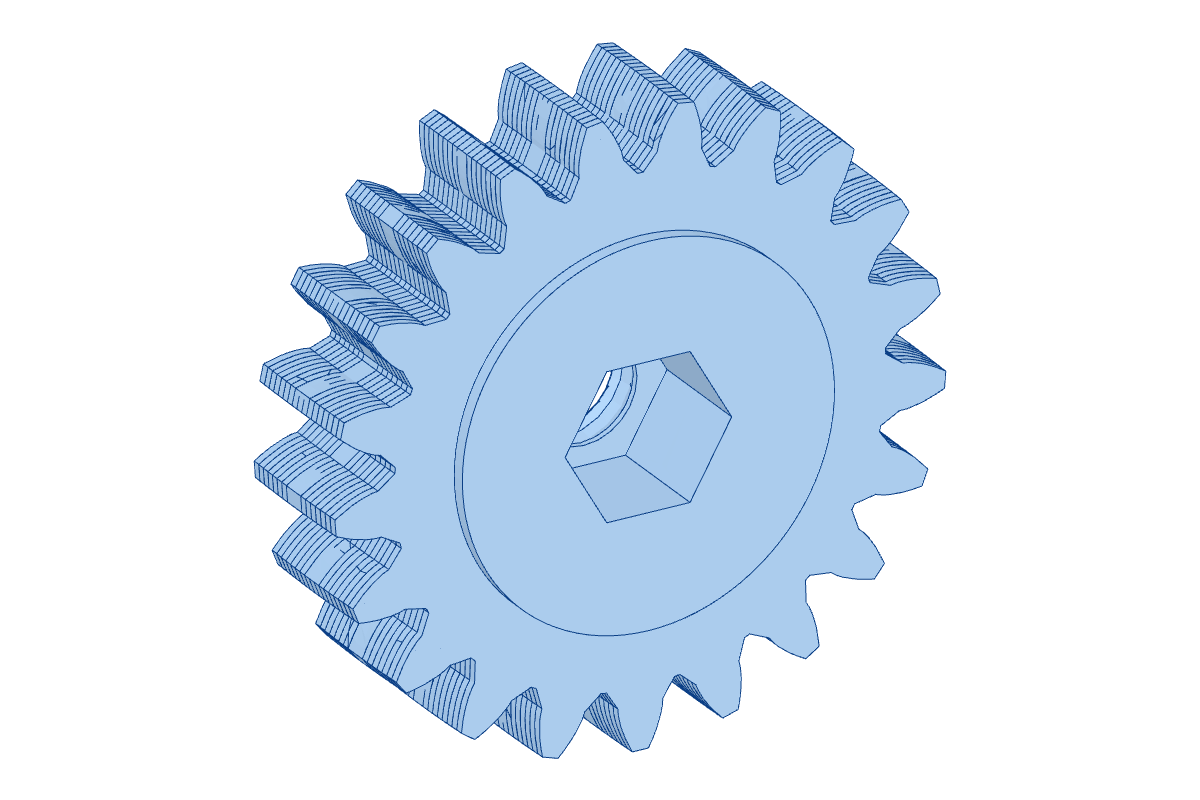
Axle spur
- ×1
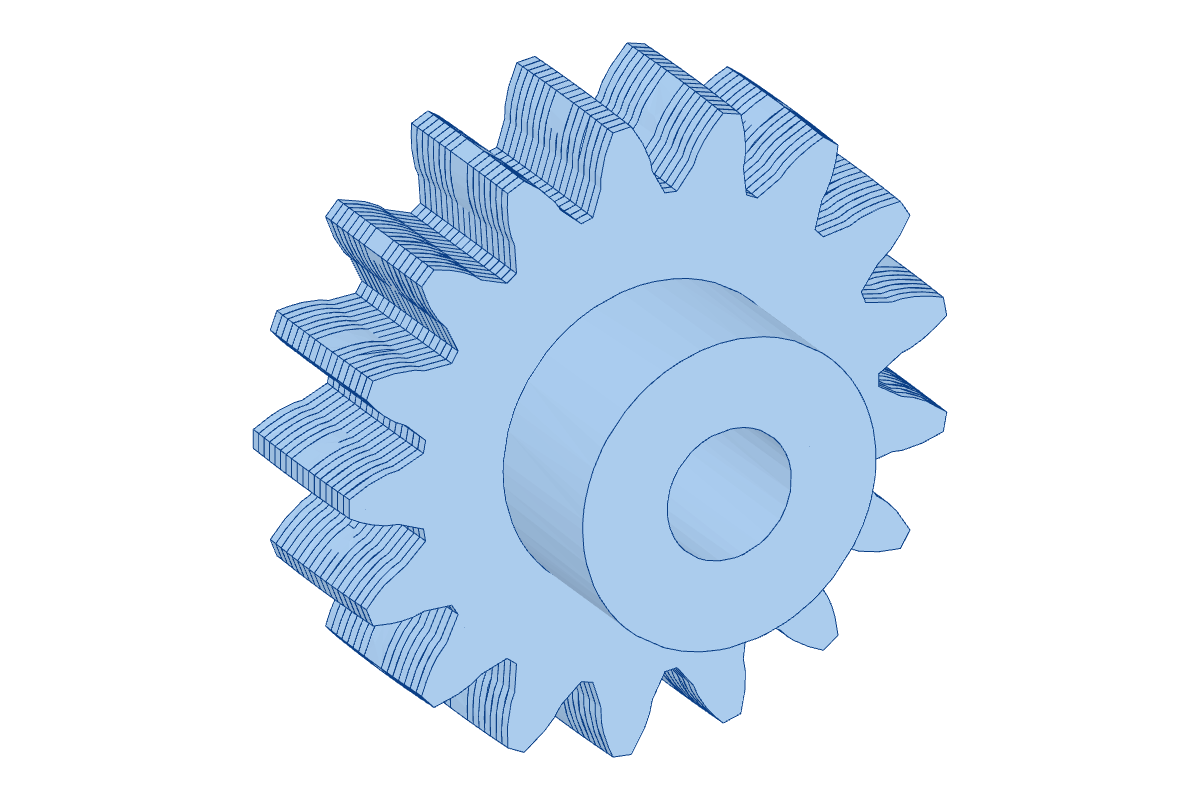
Motor spur
- ×1
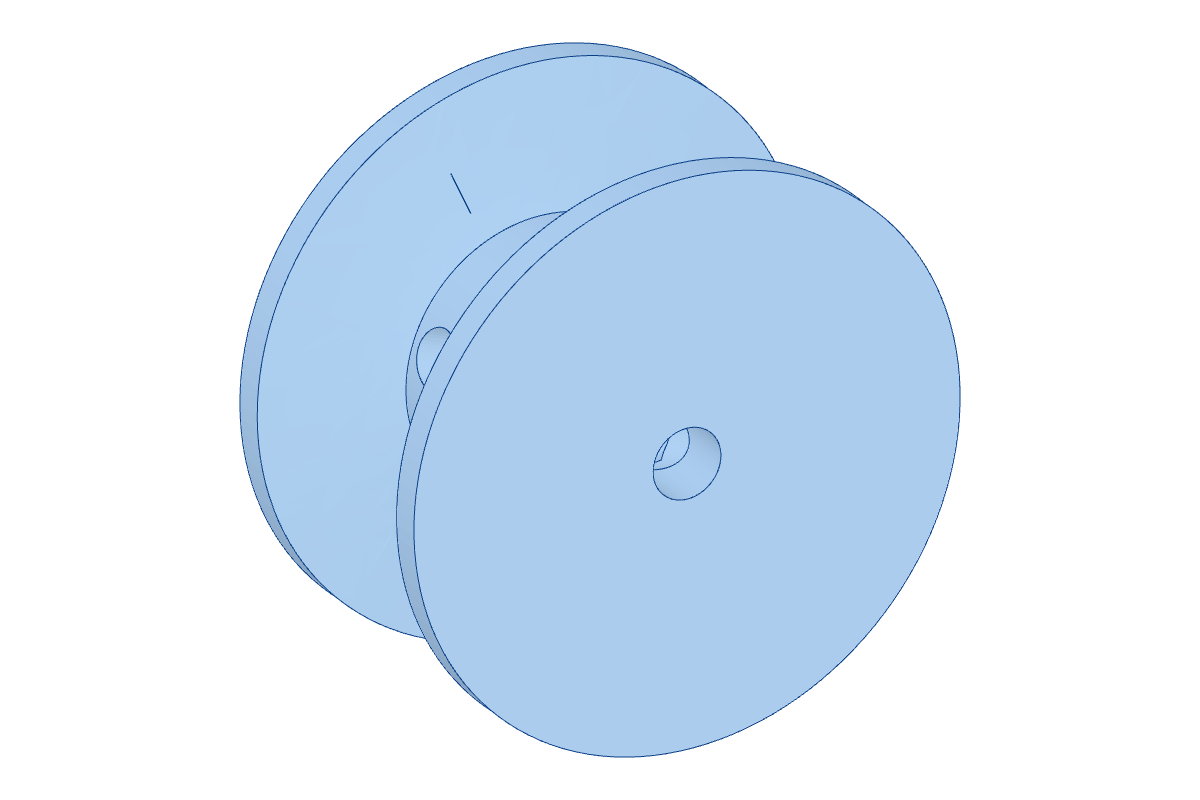
Cord reel
- ×4
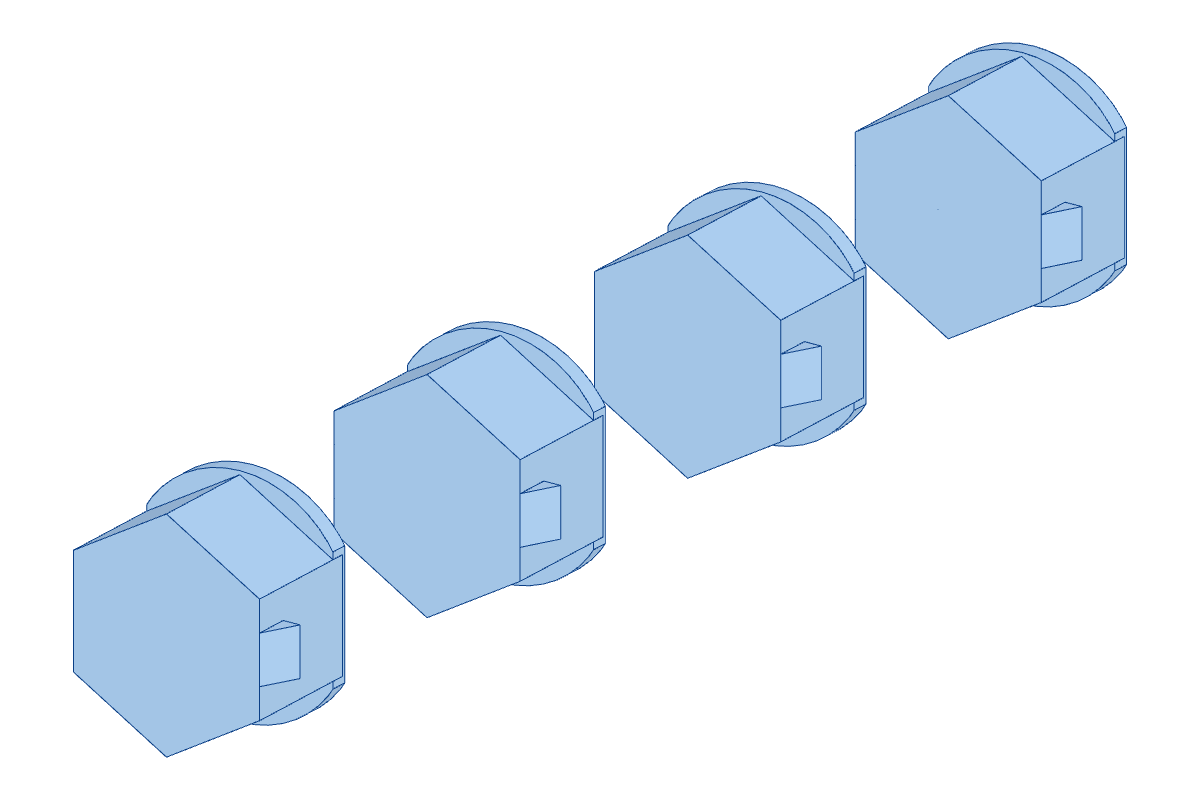
Rod adapters 11 to 14
- ×1
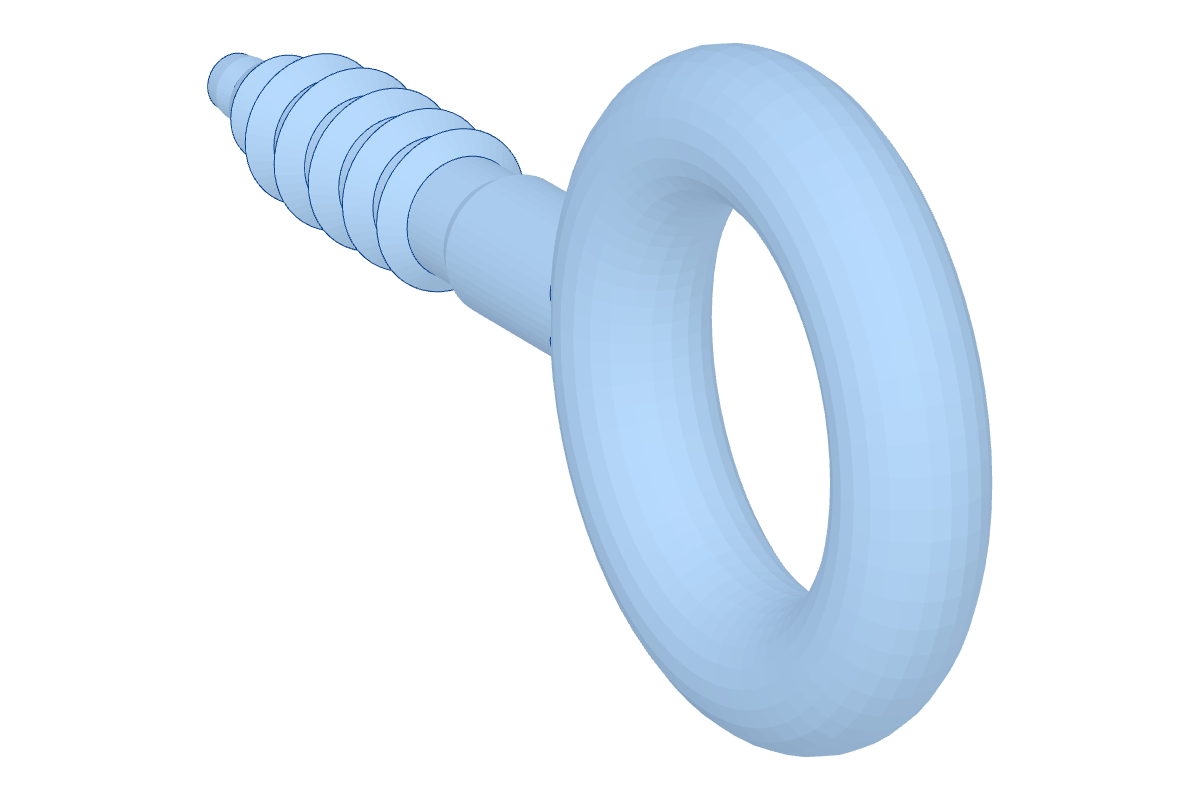
Eye screw
- ×1
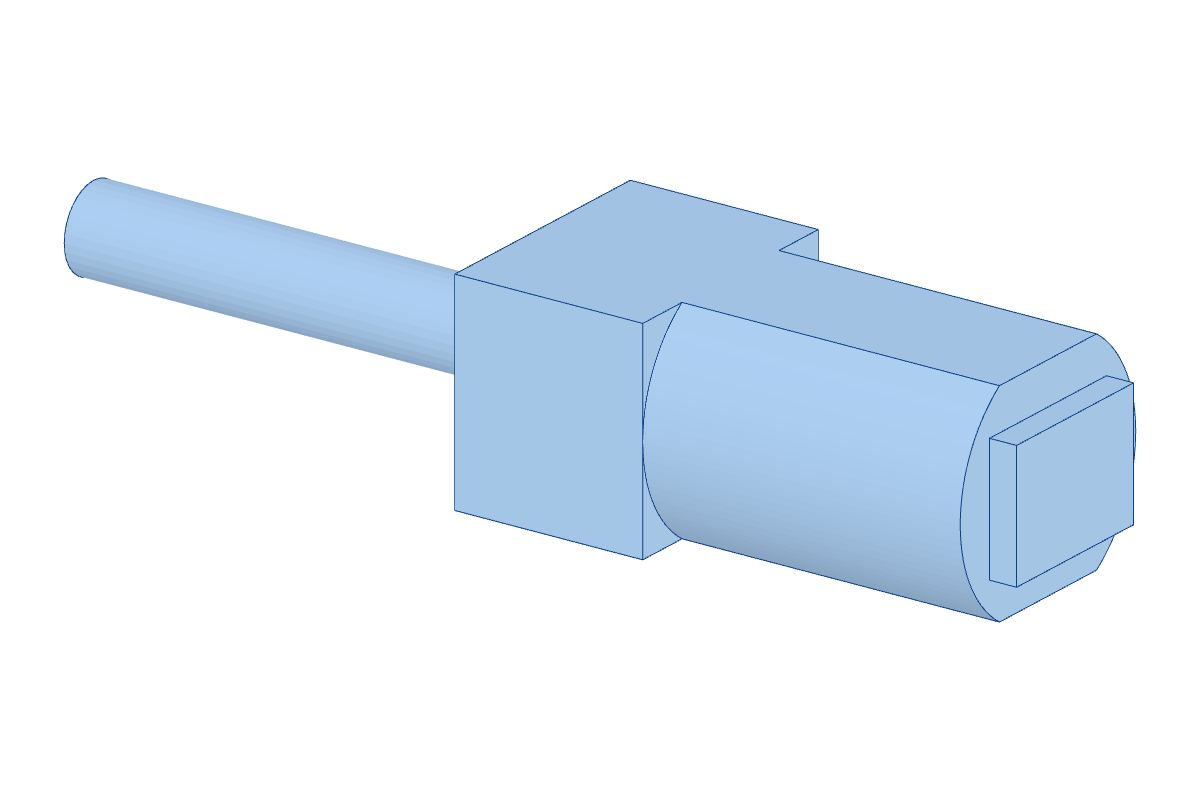
Motor
- ×14
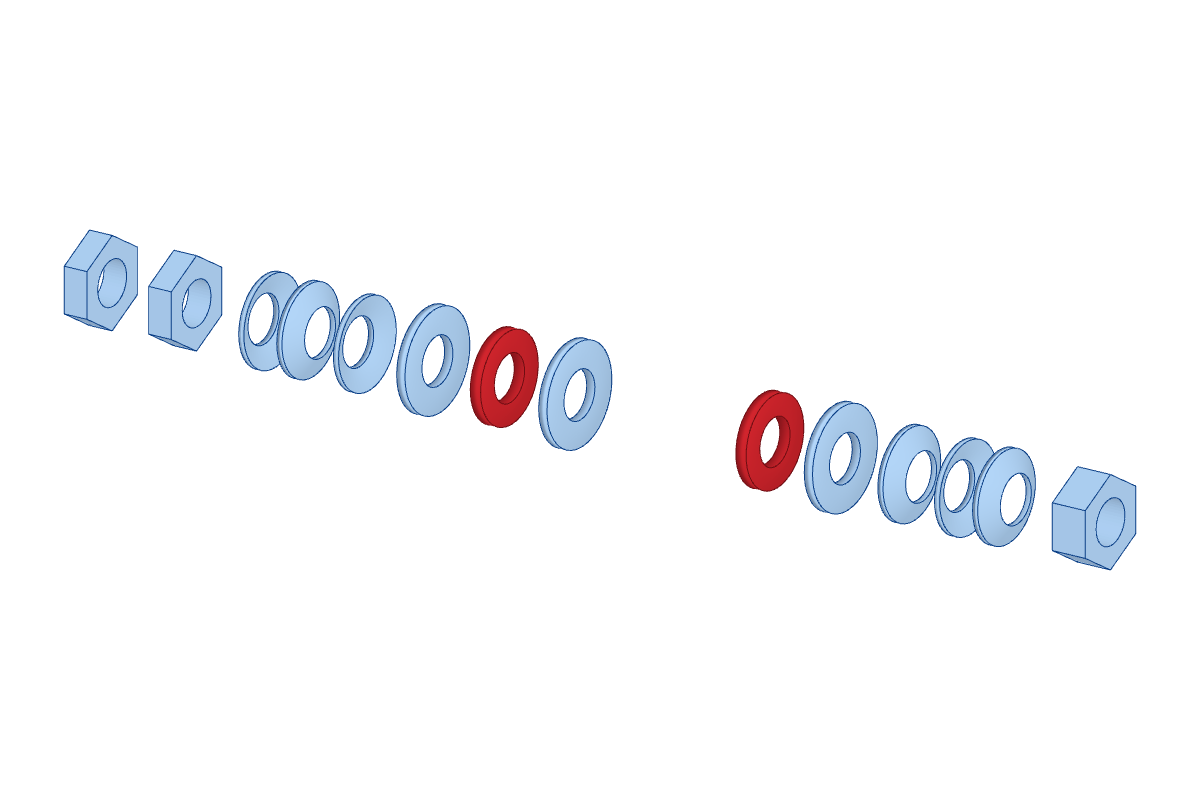
Clutch bag: nuts and washers
- ×1
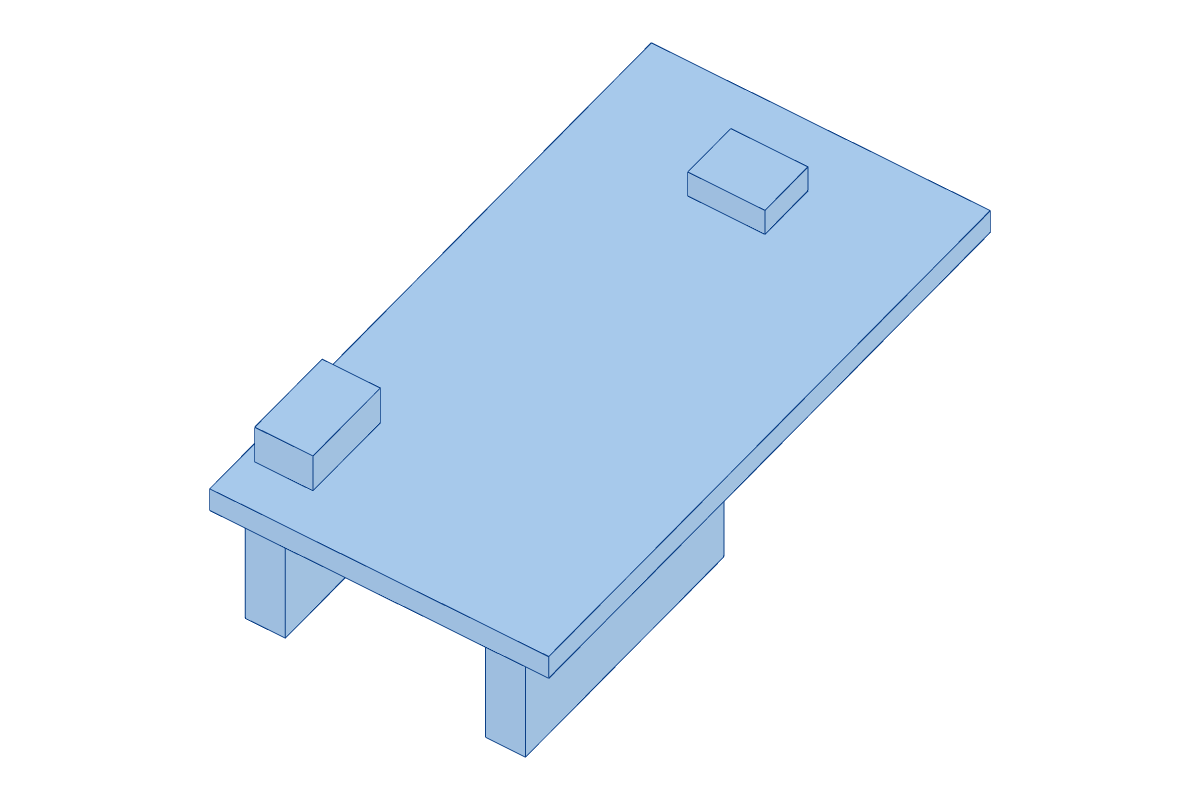
Control board
- ×1
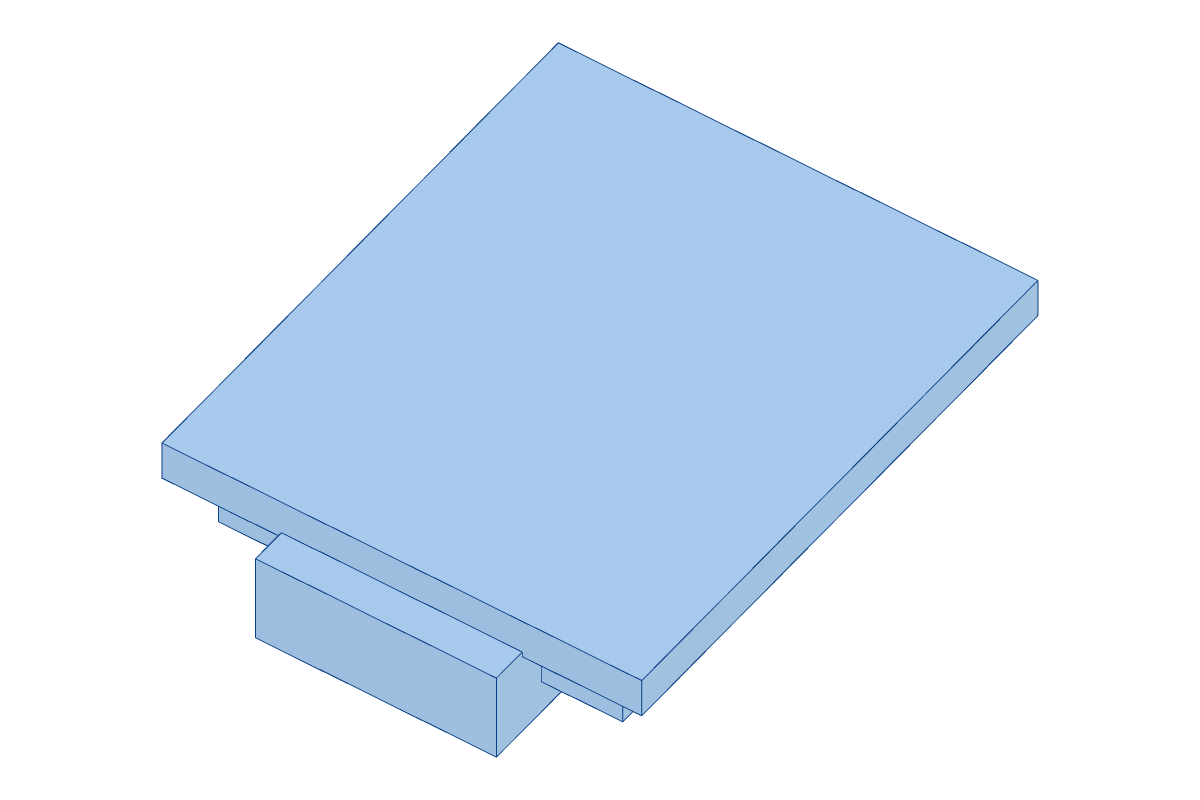
XIAO ESP32-C6
- ×1
Card with your pairing code
You'll also need
- Two 7 mm wrenches, for the clutch nuts (kits only)
- A USB-C phone charger. It's not in the box
- Your phone
Part 1 · Steps 1–14
Build the drive
In each picture, blue is the new part and the arrow shows where it goes. Gray is what you already built.
Before you start
Two minutes that save an afternoon.
Step 1: Check your headrail is 2 in tall
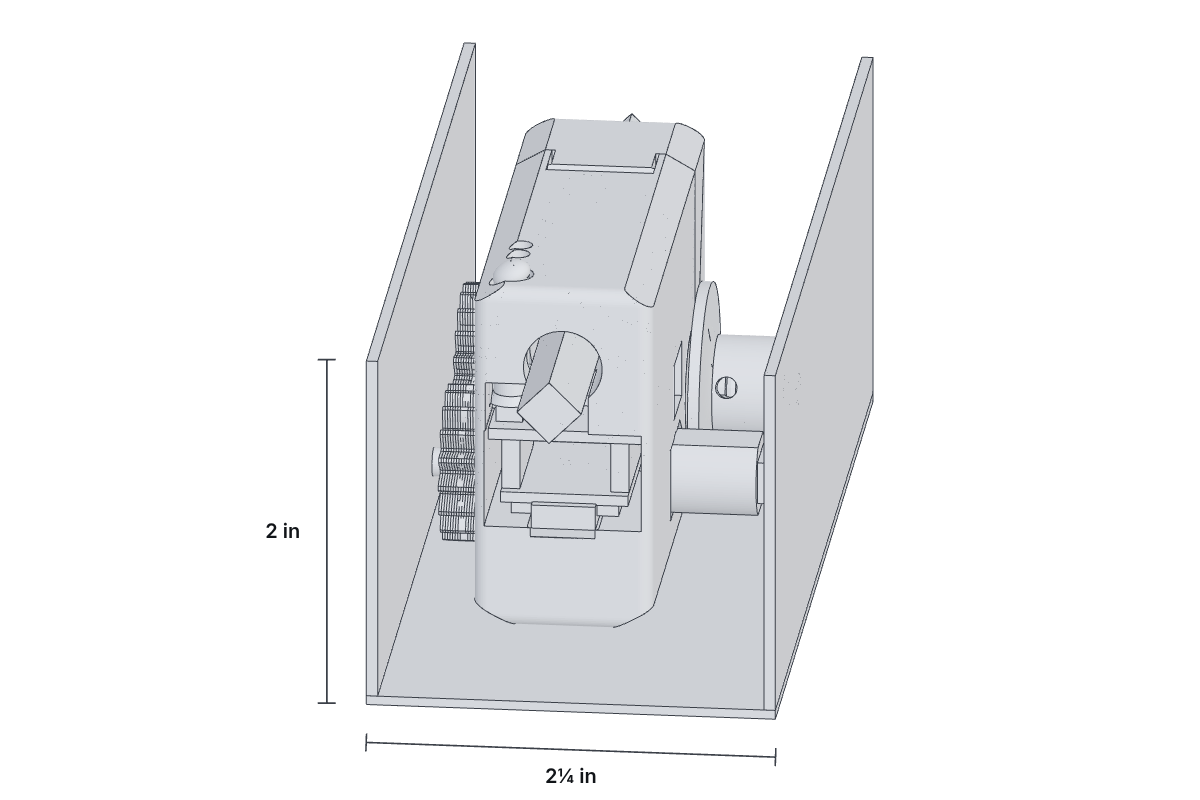
It needs a high-profile headrail: 2 in tall and 2¼ in deep, with a tilt rod inside. A 1½ in rail is too short.
Not sure? Take one photo of the open headrail with a quarter in it. The fit checker tells you.
Step 2: Find the rod adapter that fits
- Rod adapters 11 to 14
Try adapters 11 to 14 on the end of your tilt rod. Keep the one that slides on snug, with no wiggle.
11 is a D shape, 12 and 13 are hex, 14 is square. None fit? The adapter maker makes one for your rod, free, to print.
Step 3: Pick cord or wand
Blind tilts with a pull cord? You use the cord reel.
Blind tilts with a twist wand? You use the eye screw.
Both are in the box. Keep the other one as a spare.
Build the drive
Kits only. Everything snaps, slides or screws together. No glue, no soldering. Assembled unit? Skip to Part 2.
Step 4: Press the magnet into the crown
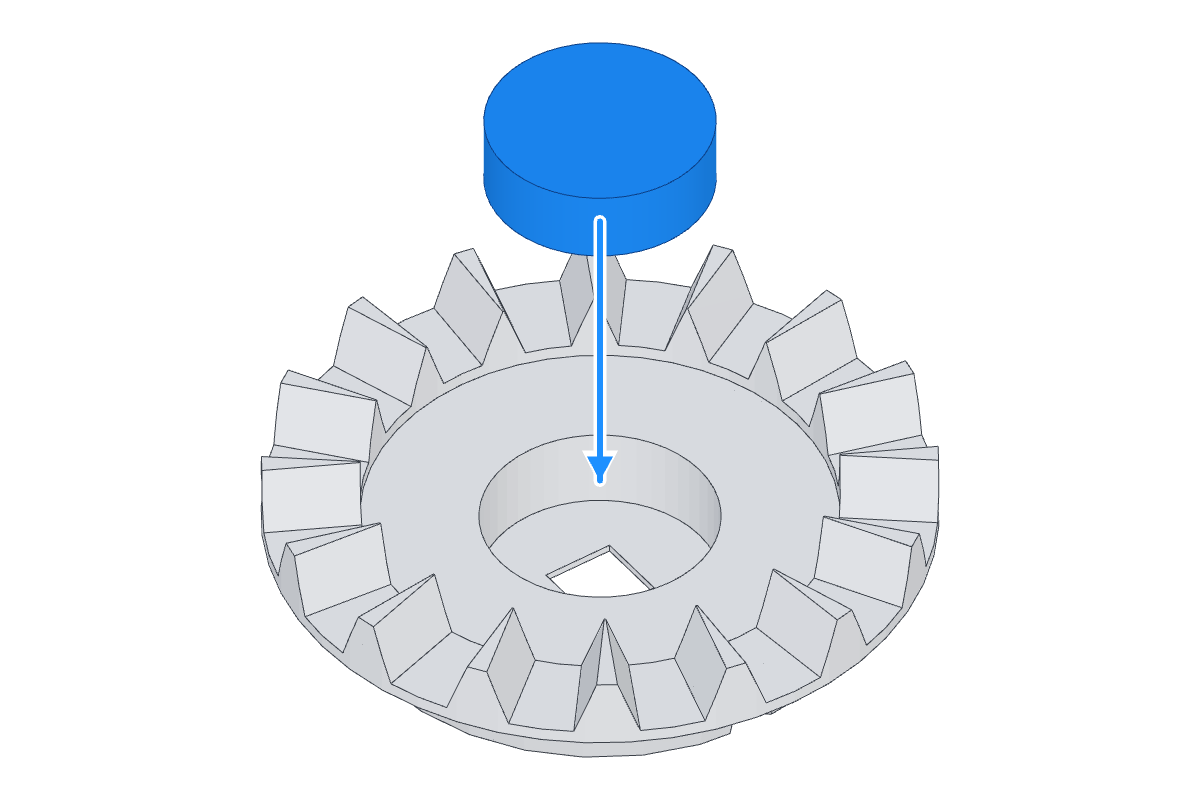
- Crown gear (white, 16 teeth)
- Encoder magnet, 4.7 × 3 mm
Push the small round magnet (4.7 mm across, 3 mm thick) into the little hole in the middle of the crown gear until it sits flat on the bottom.
Either side can face up.
Watch for: Keep the magnet away from tools and the motor. It jumps to steel and can chip.
Step 5: Snap the crown into shell A
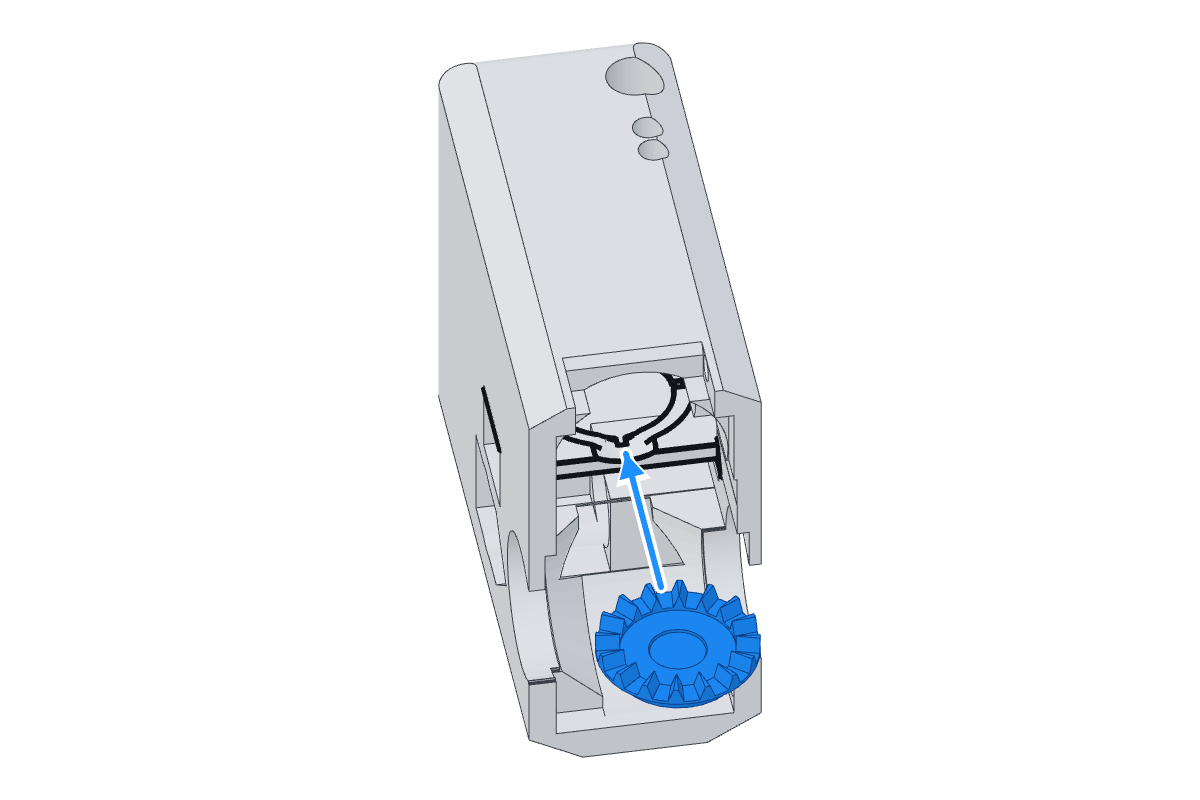
- Crown gear
- Shell A
Teeth and magnet face up.
Step 6: Slide in the rod gear, then snap it down
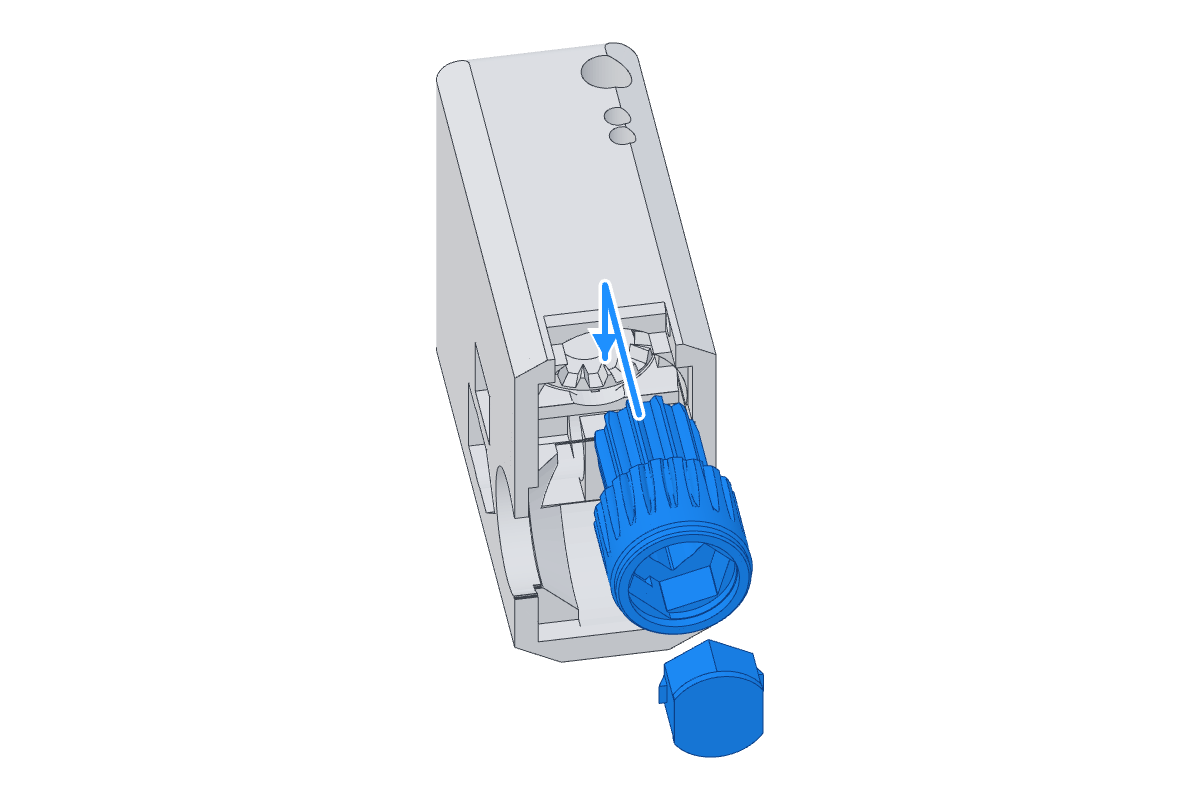
- Rod gear (black)
- Your rod adapter
Press your rod adapter into the black rod gear first.
Slide the gear into shell A, then push it down until it snaps in with its small teeth touching the crown.
Step 7: Snap in the worm
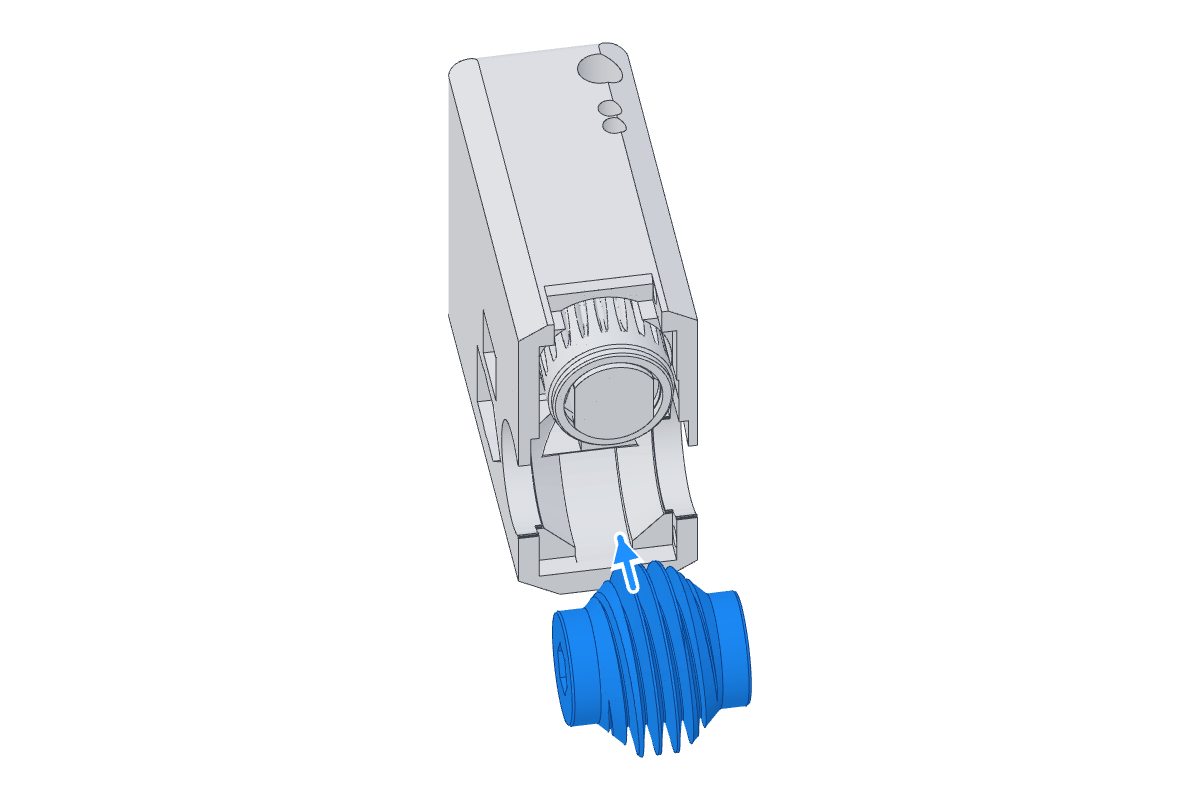
- Worm (black)
The worm is the black spiral gear. Snap it into its cradle under the rod gear, so the spiral meets the gear's teeth.
Step 8: Hook on shell B and swing it shut
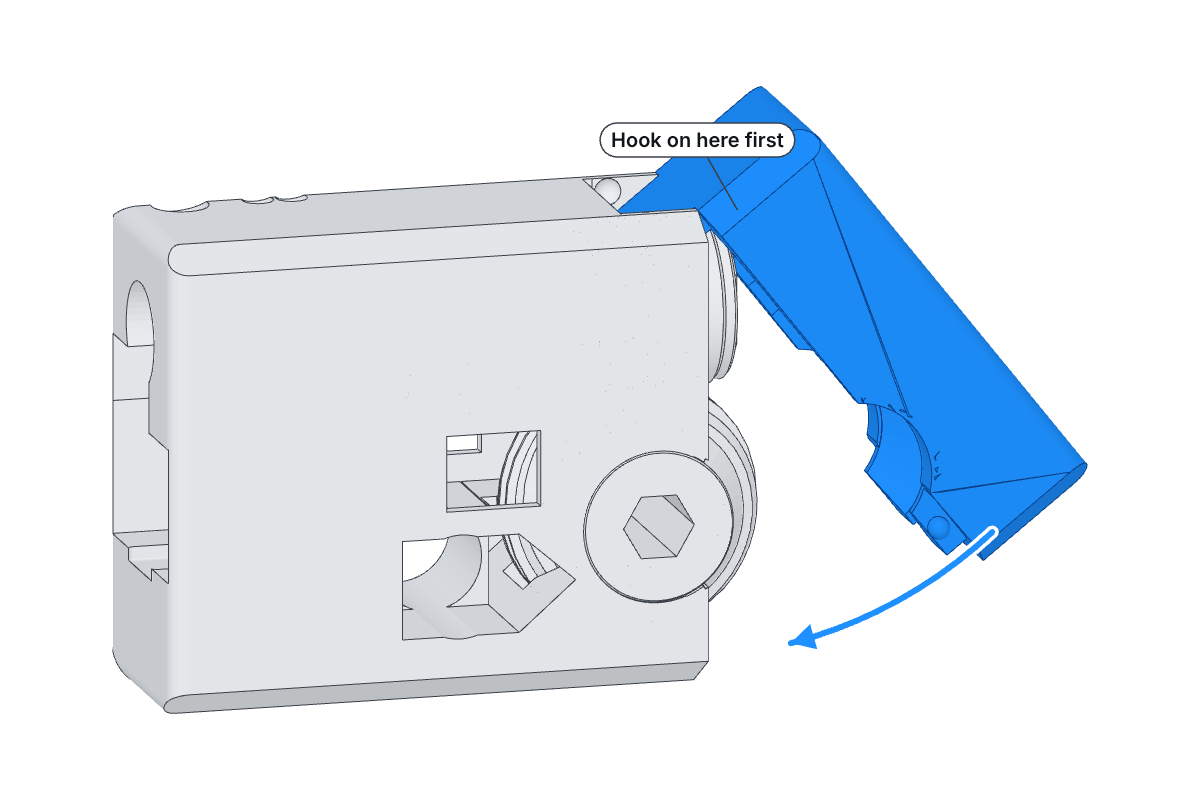
- Shell B
Hook the top edge of shell B onto the top of shell A first.
Then swing the bottom down until it clicks, like closing a lighter lid. That's the gearbox done.
Step 9: Slide in the axle, then cap both ends
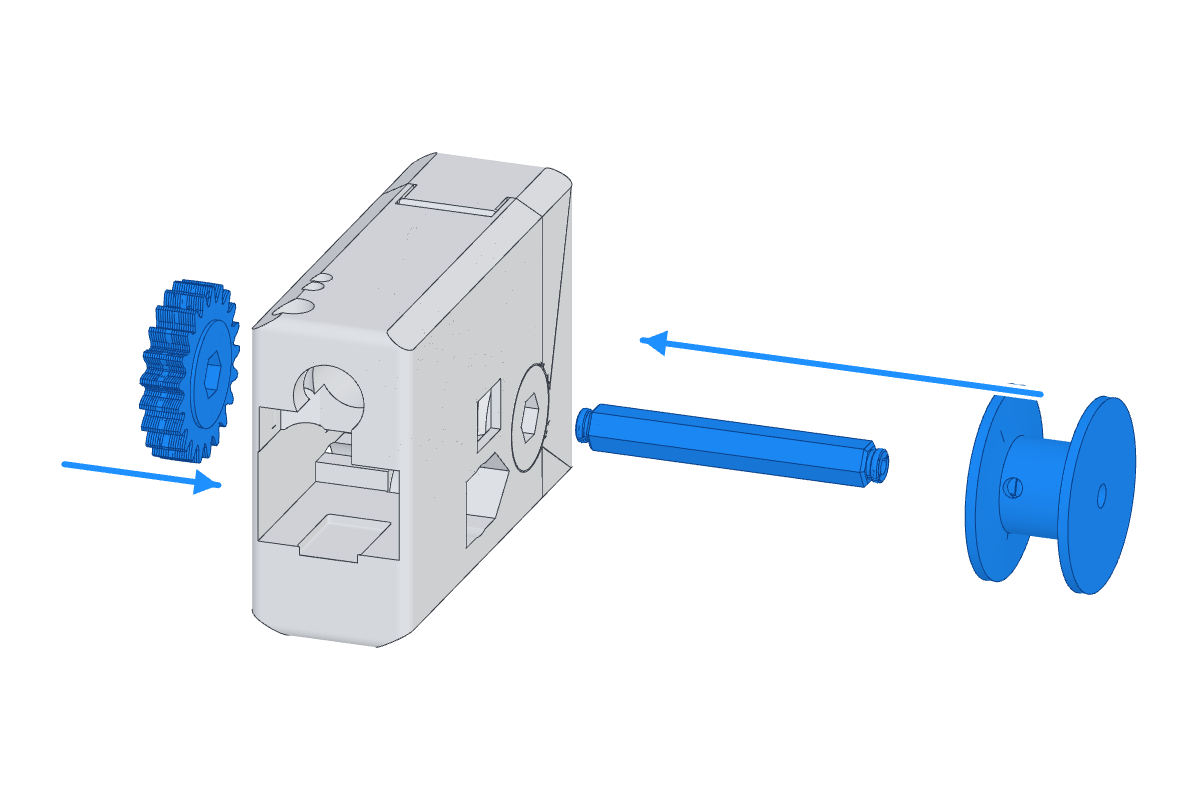
- Axle (black, hex)
- Axle spur (black)
- Cord reel
Push the hex axle through the shell and the worm until it sticks out both sides.
Press the small axle spur onto the back end and the cord reel onto the front end. They snap on and hold the axle in.
Watch for: Push them straight on. Bending the split tips sideways can crack them.
Step 10: Slide the motor into the lower window
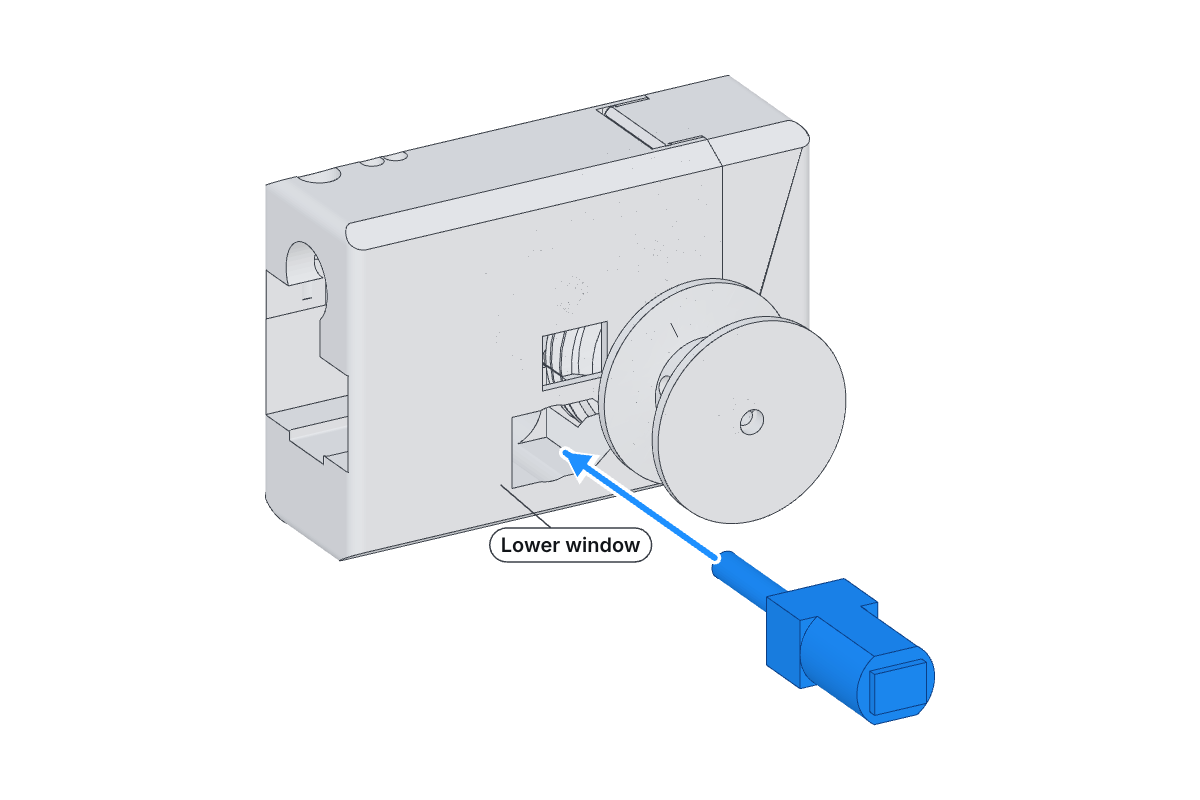
- Motor
Shaft first, from the front. Push it in until the threaded shaft pokes out the back, next to the axle spur. No screws.
Step 11: Stack the clutch, pieces 1 to 11
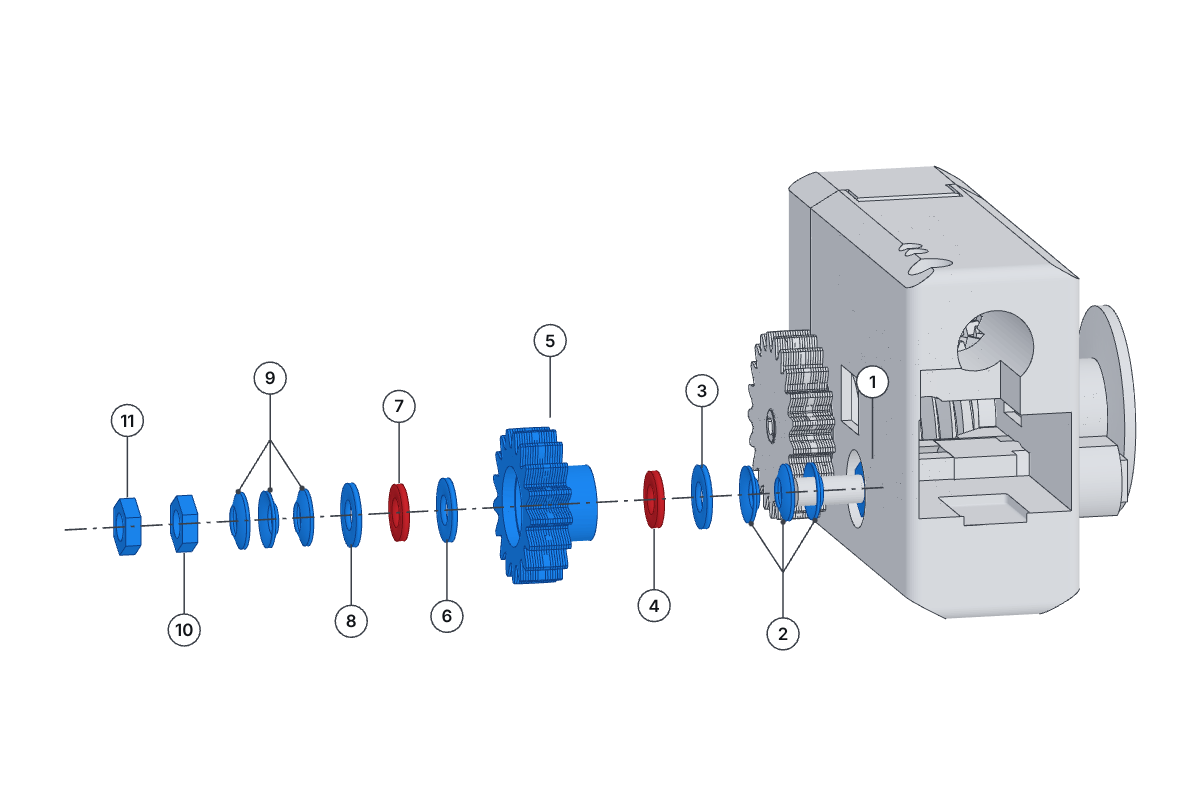
- 1 · Base nut
- 2, 9 · Belleville washer ×3 each
- 3, 6, 8 · Flat washer ×3
- 4, 7 · Fiber washer ×2 (red)
- 5 · Motor spur (black)
- 10, 11 · Thin nut ×2
Put each piece on the motor shaft at the back, in number order, starting at the shell. The picture and the parts box show the order.
Base nut 1 goes all the way down the thread and gets tightened hard.
Each set of 3 Belleville washers alternates: cup one way, then the other, then back.
Gear 5 goes hub first, teeth touching the axle spur. Keep the red fiber washers on each side of it clean and dry. No oil.
Spin thin nut 10 down by hand until it stops. Then turn it exactly one more full turn with a 7 mm wrench.
Hold nut 10 with one wrench and tighten thin nut 11 against it with the other.
Turn the reel by hand. Everything should spin smoothly together.
Watch for: Belleville washers all facing the same way won't let the clutch slip. If something sticks when you turn the reel, take off the reel and spur, open shell B, reseat the gear and try again.
Step 12: Push the button up into its hole
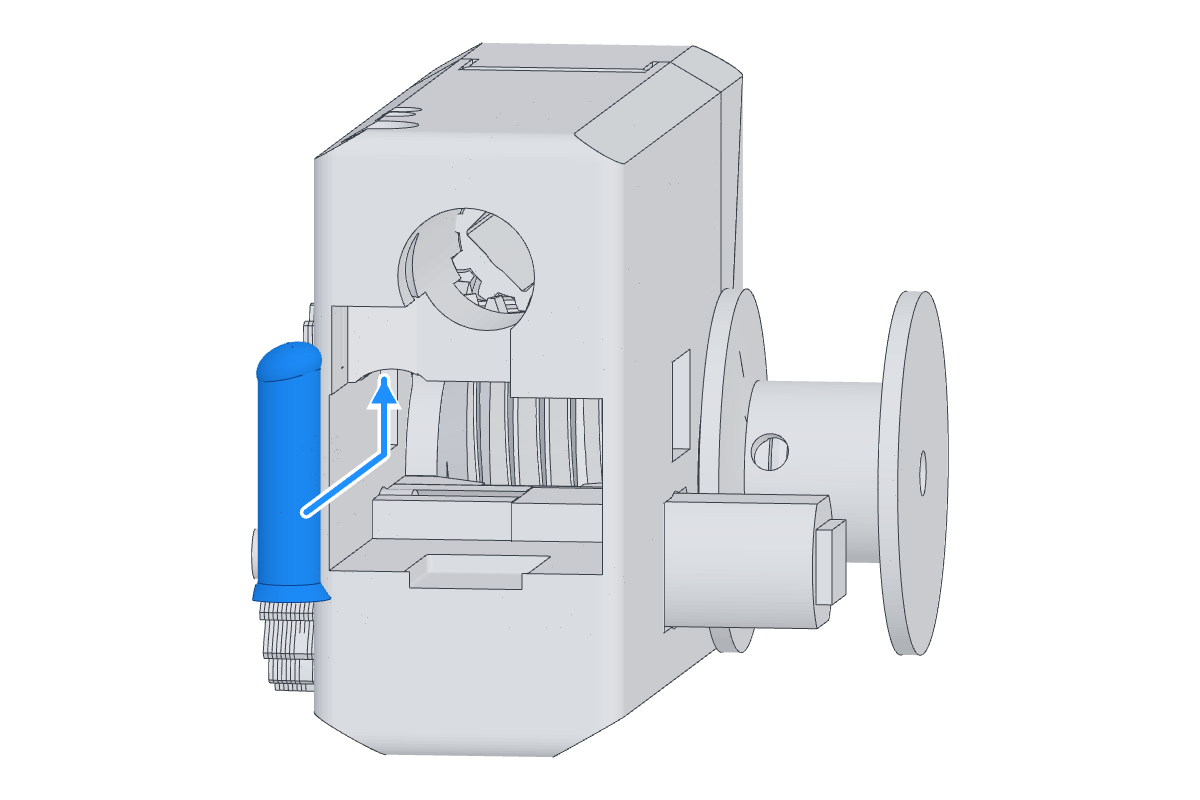
- Button plunger
Slide the button in through the open end of shell A at the USB end, cap up.
Then push it up until the cap pokes out the top. It only fits one way.
Step 13: Press the XIAO onto the board
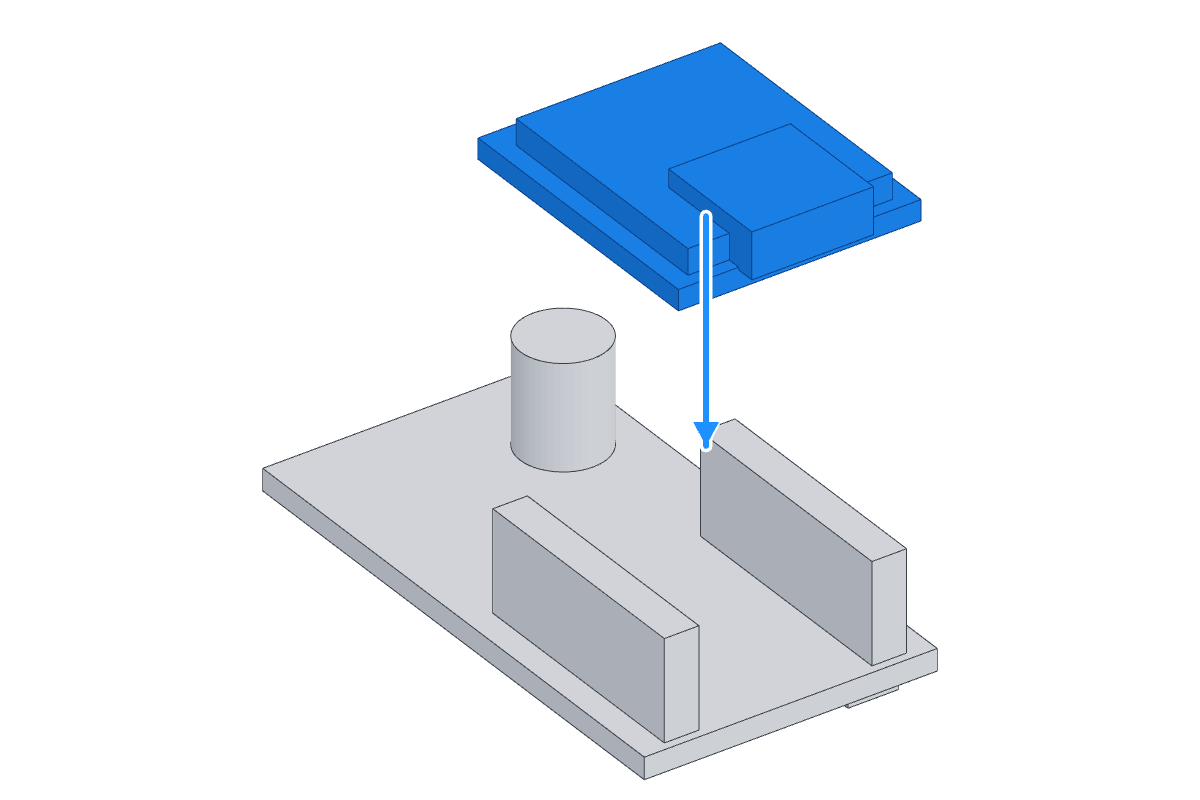
- Rev D control board
- XIAO ESP32-C6
Turn the board upside down, sockets up. Press the XIAO straight down onto them, USB-C port at the short edge.
Then plug the motor's two-wire plug into the board.
Watch for: Press straight down. Rocking it can bend a pin.
Step 14: Flip the board and slide it in
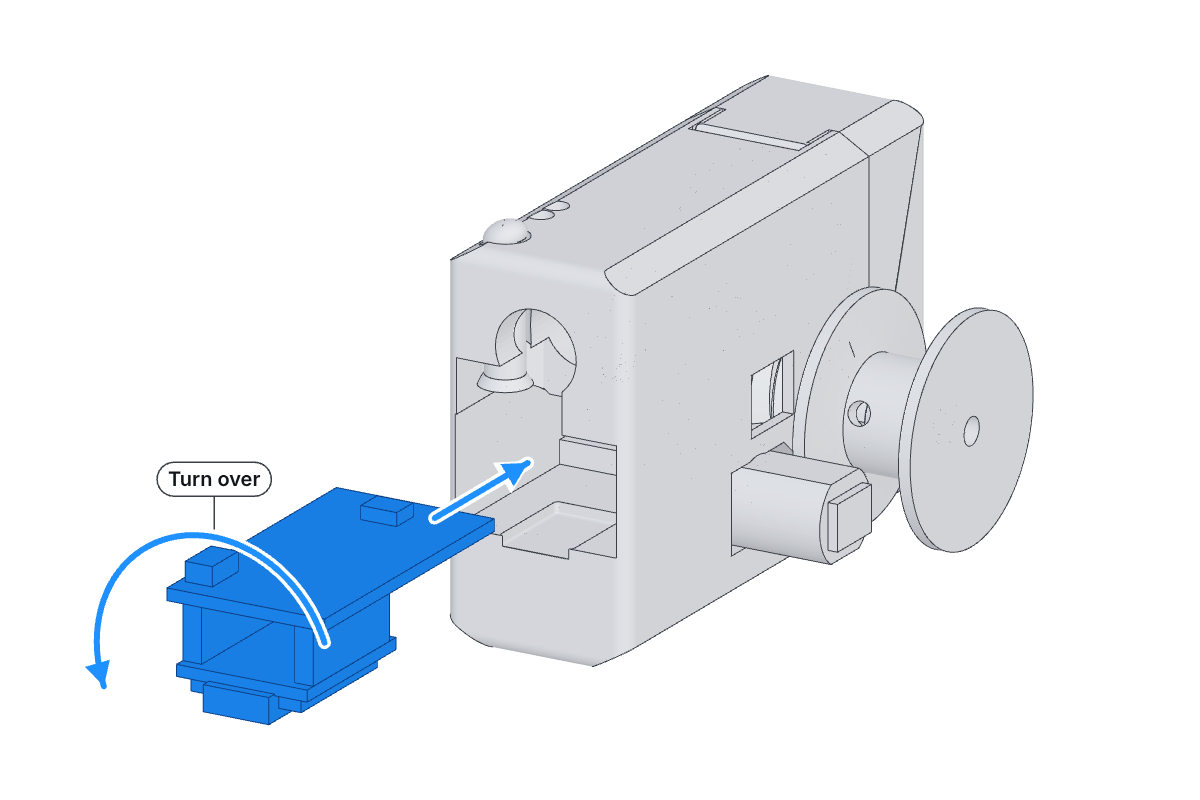
- Controller (board with XIAO)
Turn the board back over, XIAO underneath. Slide it into the open end of shell A, along the rod, under the button.
Go slowly and keep it straight. It's a snug fit.
Watch for: Don't force it. Snagging a part on the board can break it off.
Part 2 · Steps 15–23
Put it up and set it up
Assembled unit? Start here. Haven't checked your headrail and picked a rod adapter yet? Do steps 1 to 3 first.
Built a kit? Nice. The drive is done.
Fit the attachment
Cord or wand, on the front end of the axle.
Step 15: Wind the cord 4 times each way
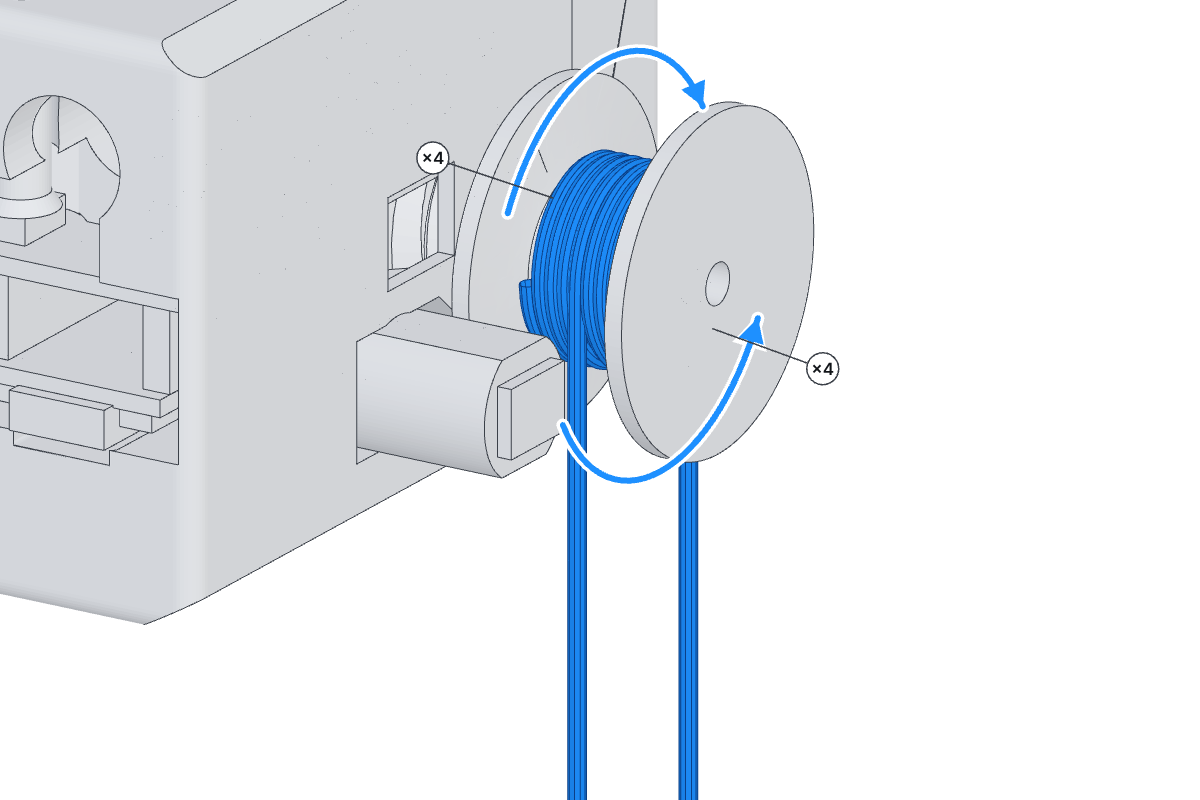
- Cord reel
- Your blind's tilt cord
Open the blinds all the way first. Assembled unit? Press the reel onto the front of the axle until it snaps.
Wrap one side of the cord 4 times around the reel, on the half near the shell. Wrap the other side 4 times on the outer half, the other way round. 3 times is the least that holds.
Let both ends hang straight down.
Watch for: If both sides wrap the same way, the reel just winds them both up.
Step 16: Twist the eye screw in, clockwise
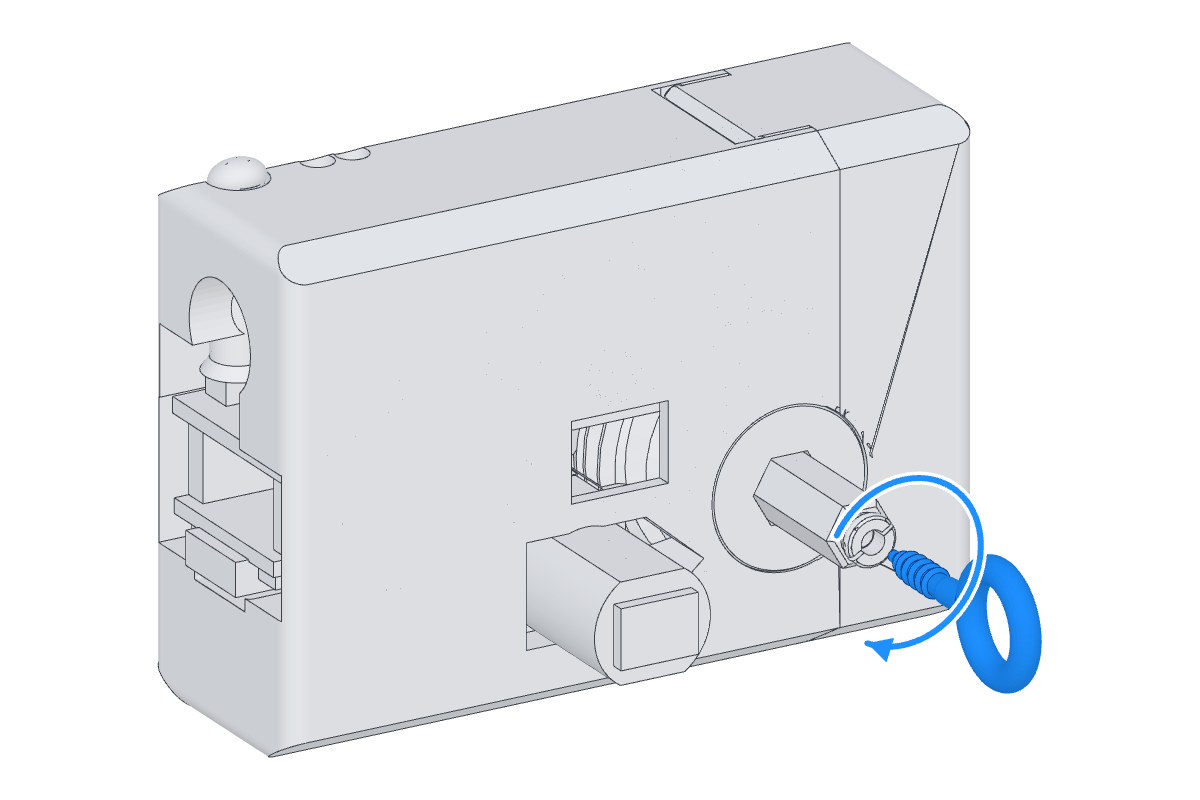
- Eye screw
Turn it by hand into the hole in the front of the axle. Stop when the eye lines up with your wand's hook.
Install it
Nothing shows on the window except the cable.
Step 17: Slide the drive onto the tilt rod
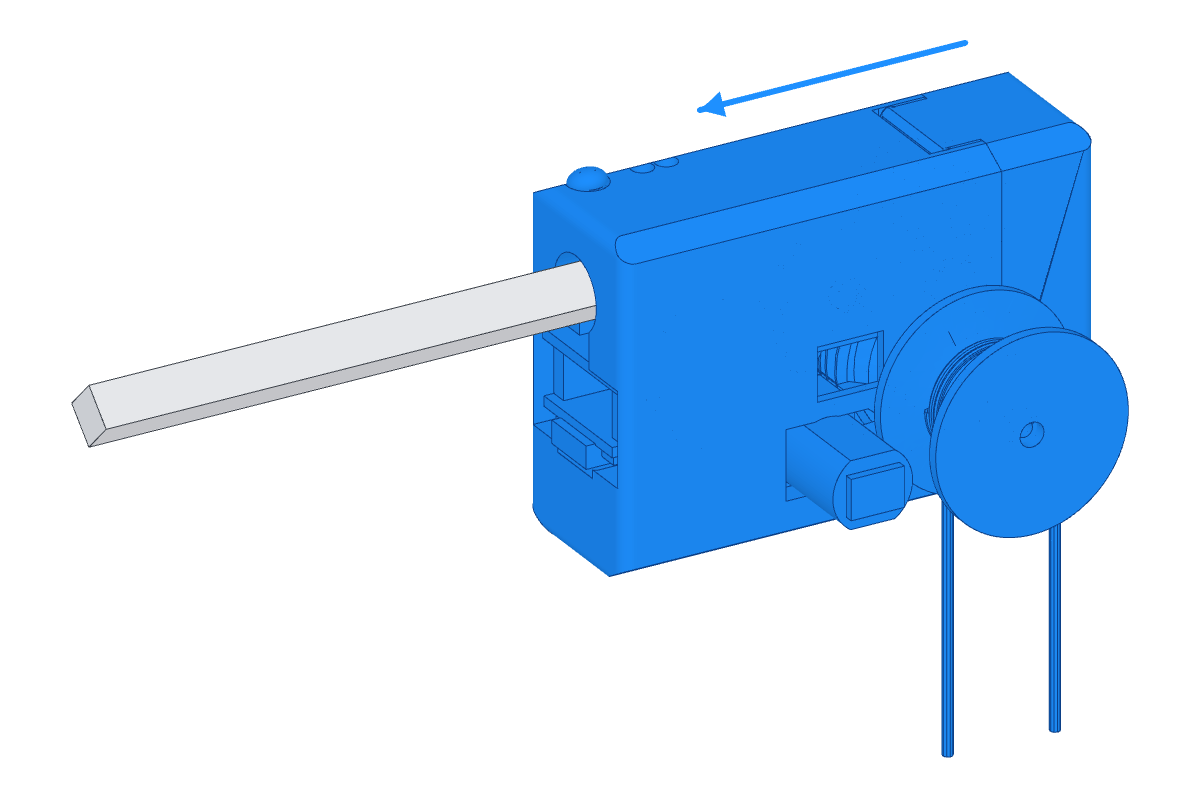
Open the top of the headrail and find a free spot on the rod near one end.
Cord blinds: first drop both cord ends down through the hole in the bottom of the rail. You can't reach them later. Put the cord's end caps back on afterward.
Slide the drive onto the end of the rod until the adapter is all the way on.
Wand blinds: tip the drive about 30° so the eye screw points down toward the wand.
Step 18: Plug in the USB-C cable
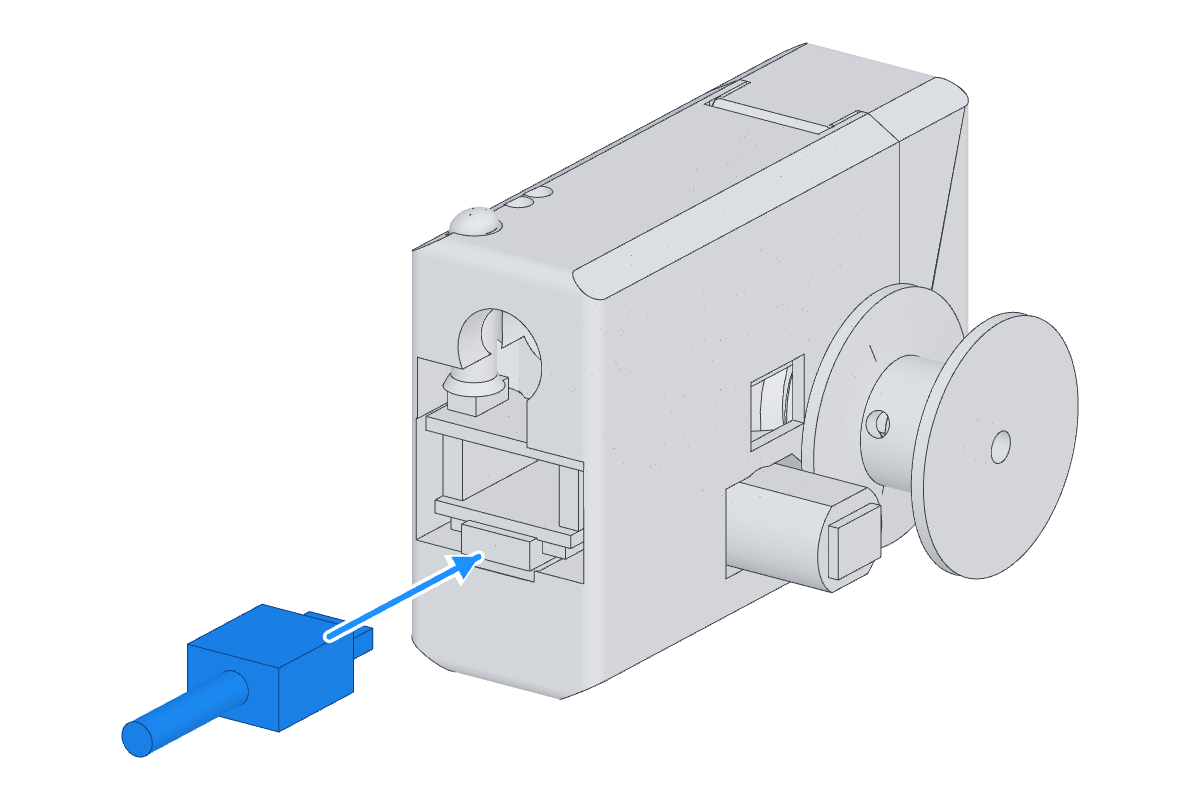
- USB-C cable
Plug it into the end of the drive. Run it out the end of the headrail and down to an outlet, then plug in the charger.
Green light on means power. Blinking blue means it's looking for Wi-Fi.
Set it up
No app and no account: your Wi-Fi, the drive's own web page, then your phone's home app.
Step 19: Join the drive's Wi-Fi, then give it yours
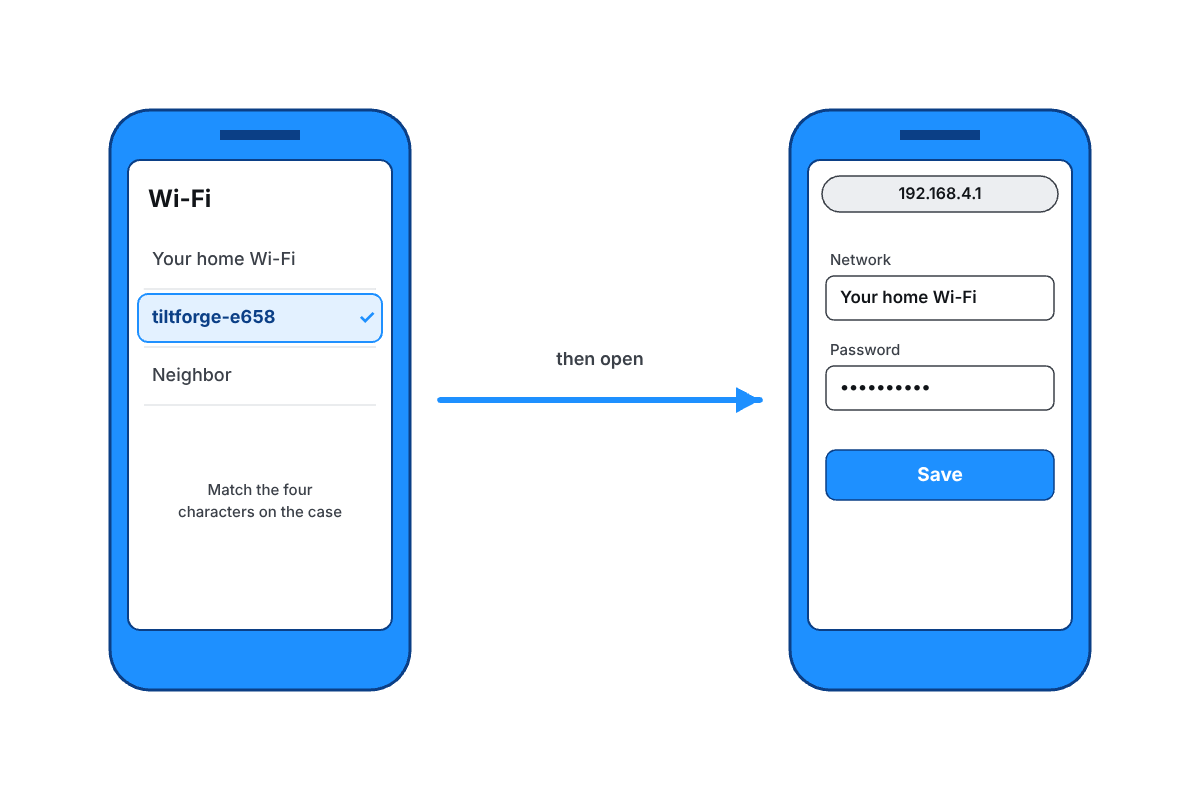
On your phone, join the network called tiltforge-####. The 4 characters match the sticker on the case.
The setup page opens. If it doesn't, go to 192.168.4.1. Pick your home Wi-Fi, type its password and tap Save.
Watch for: Your phone may say this network has no internet. That's normal. Stay on it until you tap Save.
Step 20: Open the drive's control page
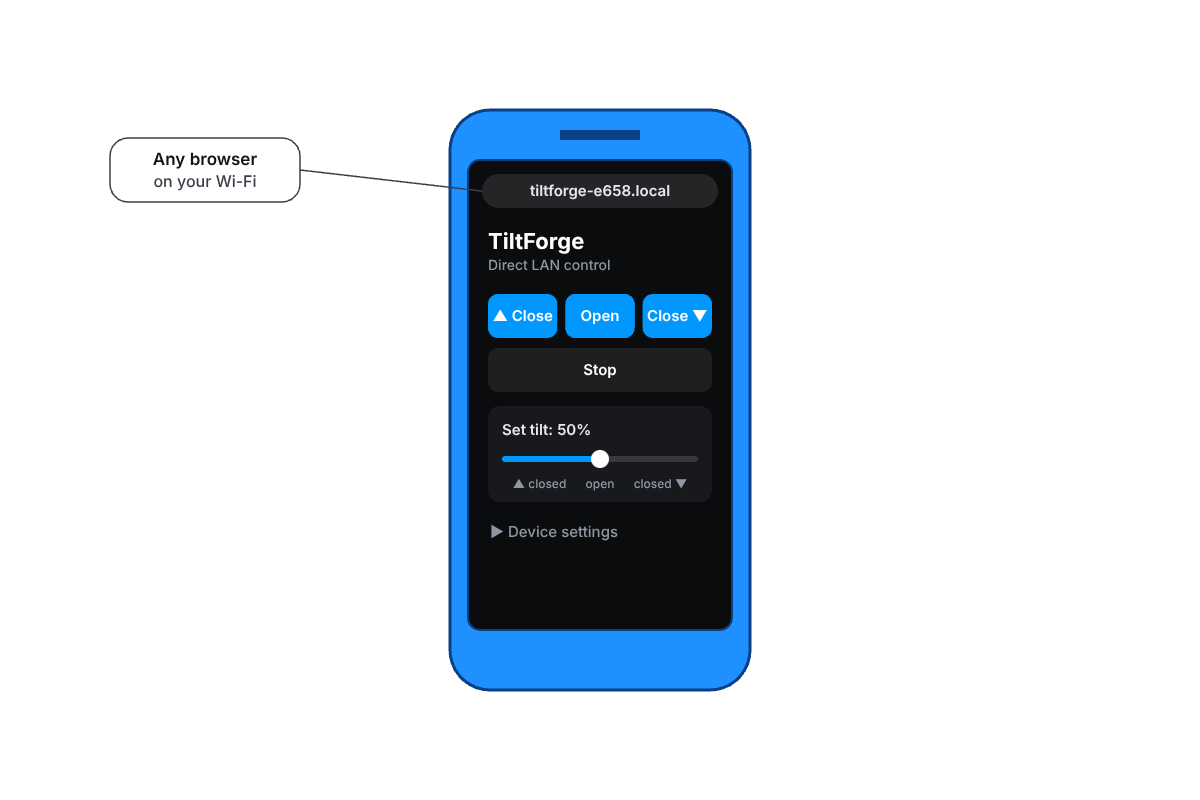
Back on your home Wi-Fi, go to tiltforge-####.local in any browser, like tiltforge-e658.local.
Open, close, stop and tilt from there. Bookmark it: Calibrate and the settings live here too.
Step 21: Add it to Apple Home
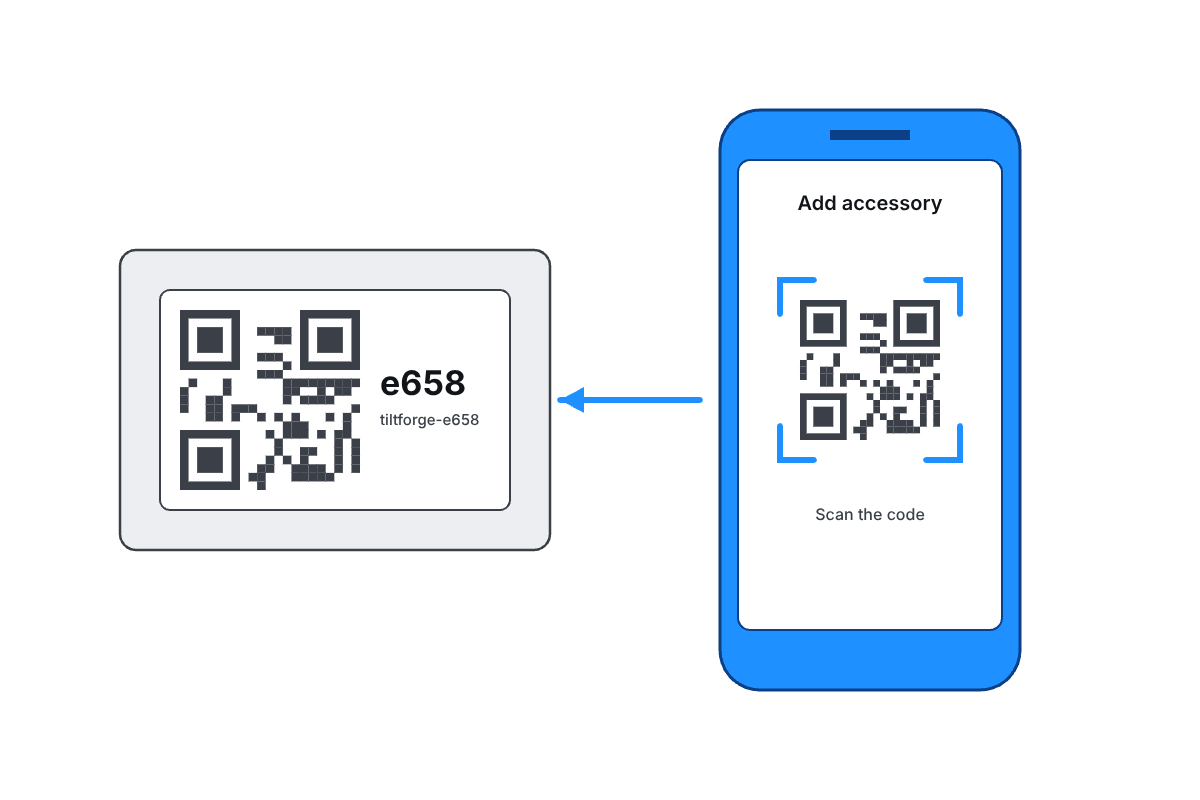
In the Home app, tap +, then Add Accessory, and scan the QR code on your insert card. Two quick green blinks mean it's ready.
It will say "uncertified accessory". Add it anyway; it works the same.
Keep the card: the code belongs to your unit. Google Home, Alexa, SmartThings and Home Assistant use the same code: add a Matter device and scan it.
Step 22: Hold the button 5 seconds, then let go
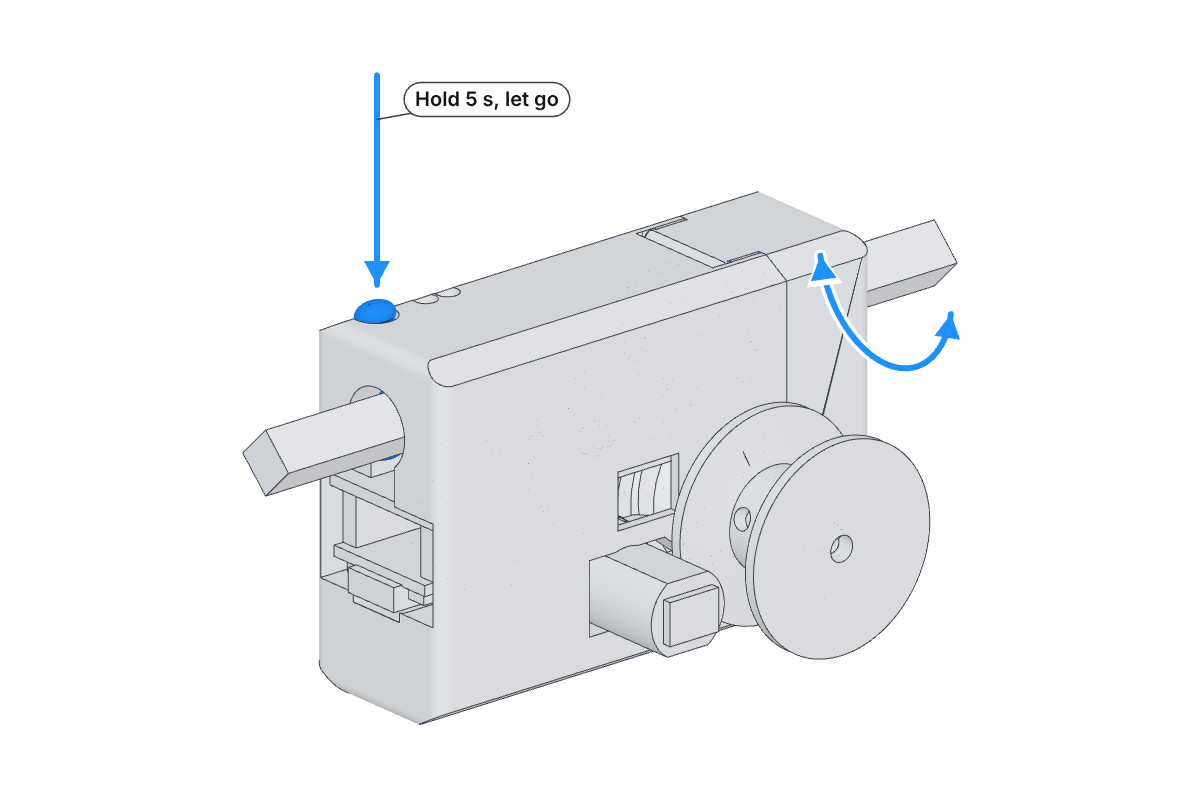
The blind tilts to each end by itself and learns them. The green light blinks while it works and stays on when it's done.
Skipped adding it to a home app? Then the button opens pairing instead. Press Calibrate on the control page: it does the same thing.
Watch for: Do this once after install, even on an assembled unit.
Step 23: Try it by hand, then from your phone
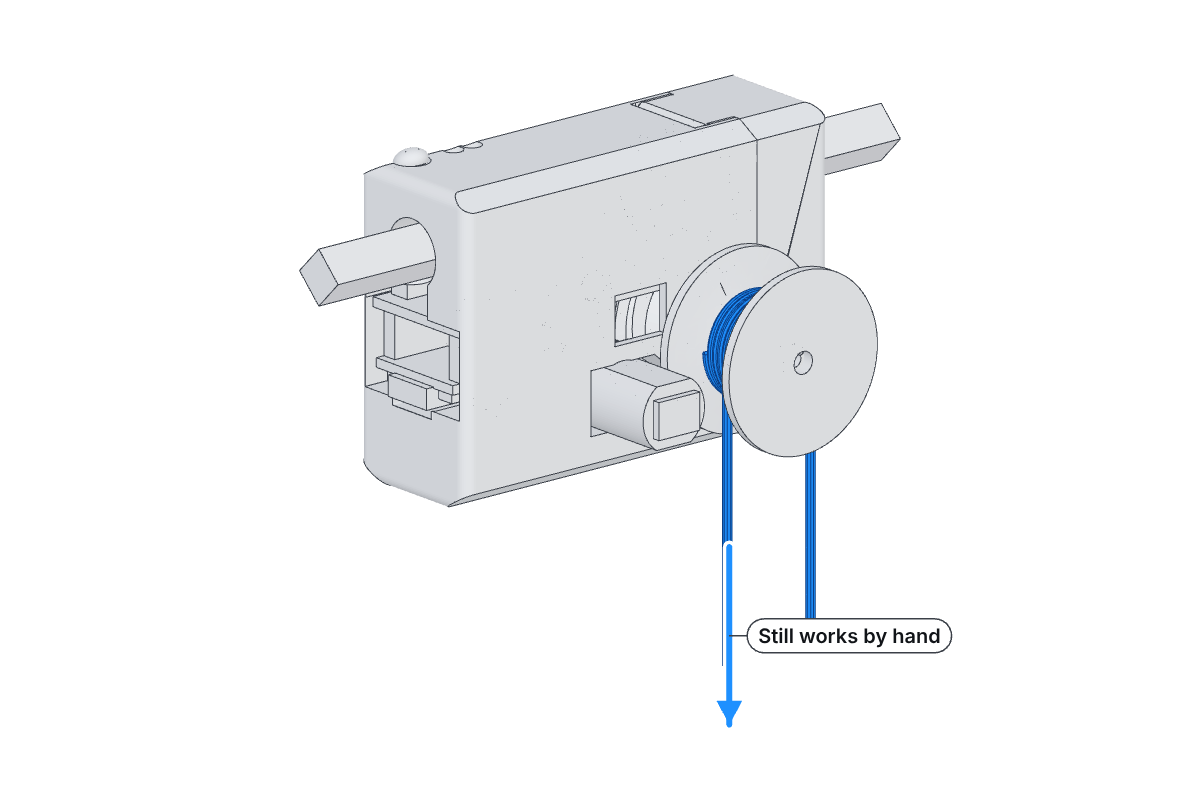
Pull the cord or turn the wand. It still works by hand.
Then open and close it from your home app. A light doing something odd? The lights page explains each one.
If something's off
The lights page reads every blink the unit can make. Every part has a QR code to its own spec sheet, and the parts that wear are sold as spares, so a worn gear set is a part, not a new unit. The warranty page covers what we stand behind. Opening it up doesn't void anything.